
Question
How do I change from Basic Authentication to OAuth Authentication for each of my ServiceNow connections registered in CI Sync?
Answer
Follow the instructions below.
Task 1: Configure OAuth Authentication in ServiceNow
These steps will be performed by a ServiceNow SME (with admin rights in your ServiceNow)
Also, different editions of ServiceNow may have different requirements for an OAuth endpoint.
The ServiceNow related instructions provided below are intended as a high-level guide only and are provided by Syncfish for general guidance.
If a Syncfish customer is unsure how to setup the ServiceNow elements for OAuth authentication for the incoming CI Sync connection, then we recommend the following:
-
Read the ServiceNow documentation on this same topic. The ServiceNow documentation can be less than clear, so if in doubt, contact your ServiceNow SME with OAuth experience. For ServiceNow Zurich release here are two articles Syncfish recommend are read in the order below
-
How to check/set a number of key settings/properties related to OAuth. See here: https://www.servicenow.com/docs/bundle/zurich-platform-security/page/administer/security/task/t_SettingUpOAuth.html
-
How to Create an endpoint for clients to access the instance. See here: https://www.servicenow.com/docs/bundle/zurich-platform-security/page/administer/security/task/t_CreateEndpointforExternalClients.html
-
-
Or, reach out to the Syncfish team. We have ServiceNow experts and are happy to assist customers who are struggling with this topic.
Here are the high-level steps to perform within your ServiceNow instance (please take the above comments into account and consult ServiceNow documentation if required).
Step 1 - Make sure the OAuth plugin is activated
-
Navigate to All > System Applications > All Available Applications > All.
-
Find the plugin using the filter criteria and search bar.
You can search for the plugin by its name or ID. If you cannot find a plugin, you might have to request it from ServiceNow personnel.
-
If the plugin is not installed yet, Select Install to start the installation process.
Step 2 - Set the OAuth Property (if not already set)
-
To use OAuth 2.0, enter sys_properties.list in the navigator and select New.
You can also open the system properties list by navigating to All > System Properties > All Properties > .
-
Filter for *oauth*
-
Make sure com.snc.platform.security.oauth.is.active is set to true
Step 3 - Change OAuth password parameter (if not already set)
-
Navigate to All > System Properties > All Properties >
-
Filter for *oauth*
-
Make sure glide.oauth.allow.parameters.in.post.body.only is set to true
Step 4 - Create an OAuth application endpoint for external client applications to access the ServiceNow instance (i.e. create an OAuth endpoint for CI Sync to target for authentication)
-
Navigate to All > System OAuth > Application Registry and then click New.
-
On the interceptor page, click Create an OAuth API endpoint for external clients.
-
Complete the fields on this form using the screen shot below and the following points for guidance
-
Name: Use a meaningful/recognizable name relative to the endpoint being for CI Sync.
-
Client Secret: Enter a complex secret or allow ServiceNow to generate one on save.
-
Redirect URL and Logo URL: No need to enter these.
-
Public Client: No need to tick this.
-
Client Type: Integration as a service.
-
Application: Global scope.
-
Accessible from: All application scopes (or as otherwise directed by your ServiceNow SME).
-
Active: Tick.
-
Other settings: Leave as default (or as otherwise directed by your ServiceNow SME).
-
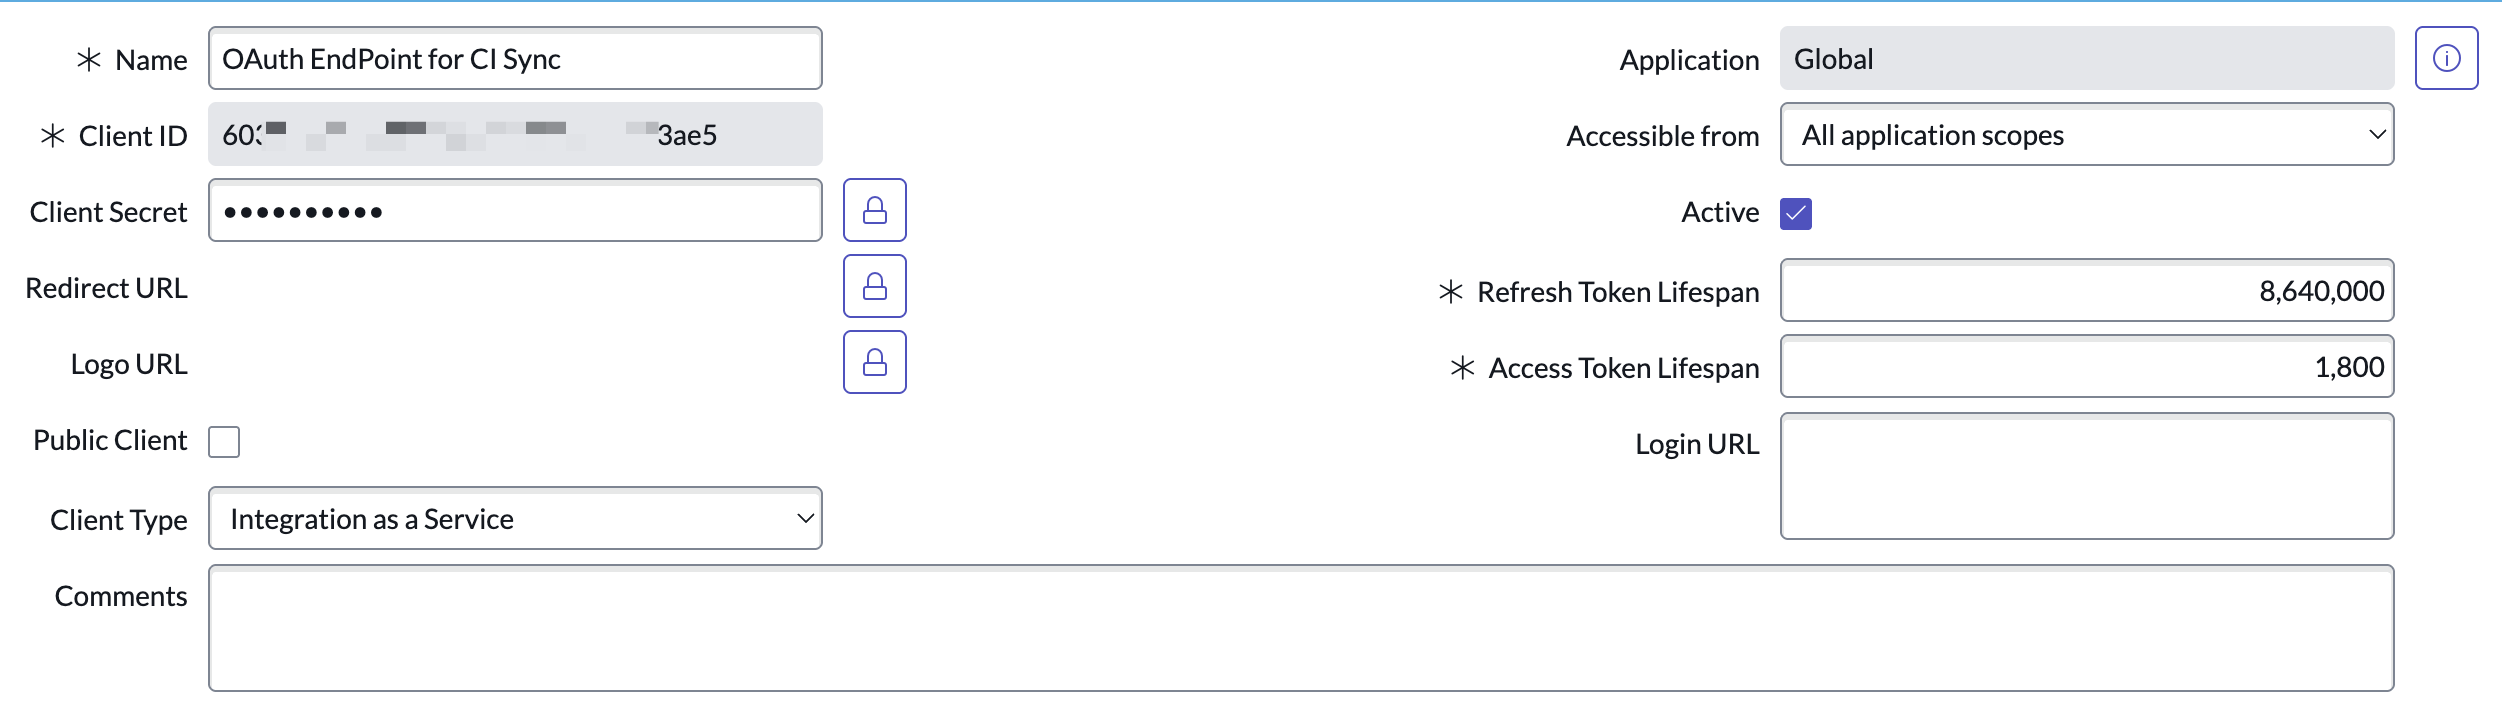
Note: This form may differ between versions of ServiceNow.
Once the OAuth setup is completed, open the application registry record created and copy the Client ID and Client Secret to edit the connection in the CI Sync SaaS User Interface in Task 2 below.
Guidance Note
Click the Client Secret padlock to view/copy the secret.
Data Capture Note
Take note of the Client Id and Client Secret as they will be required when configuring the ServiceNow connection within the CI Sync SaaS application (via the CI Sync User Interface).
Task 2: Change the Authentication type to OAuth in the CI Sync SaaS UI
These steps will be performed by your CI Sync Admin (i.e. an SME with access to the CI Sync SaaS UI)
-
Login to the CI Sync Web UI of your CI Sync SaaS instance
-
Go to the Settings page.
-
Scroll down to Destination Connections
-
For each ServiceNow connection to be updated, click the Update link (on the right-hand side)

-
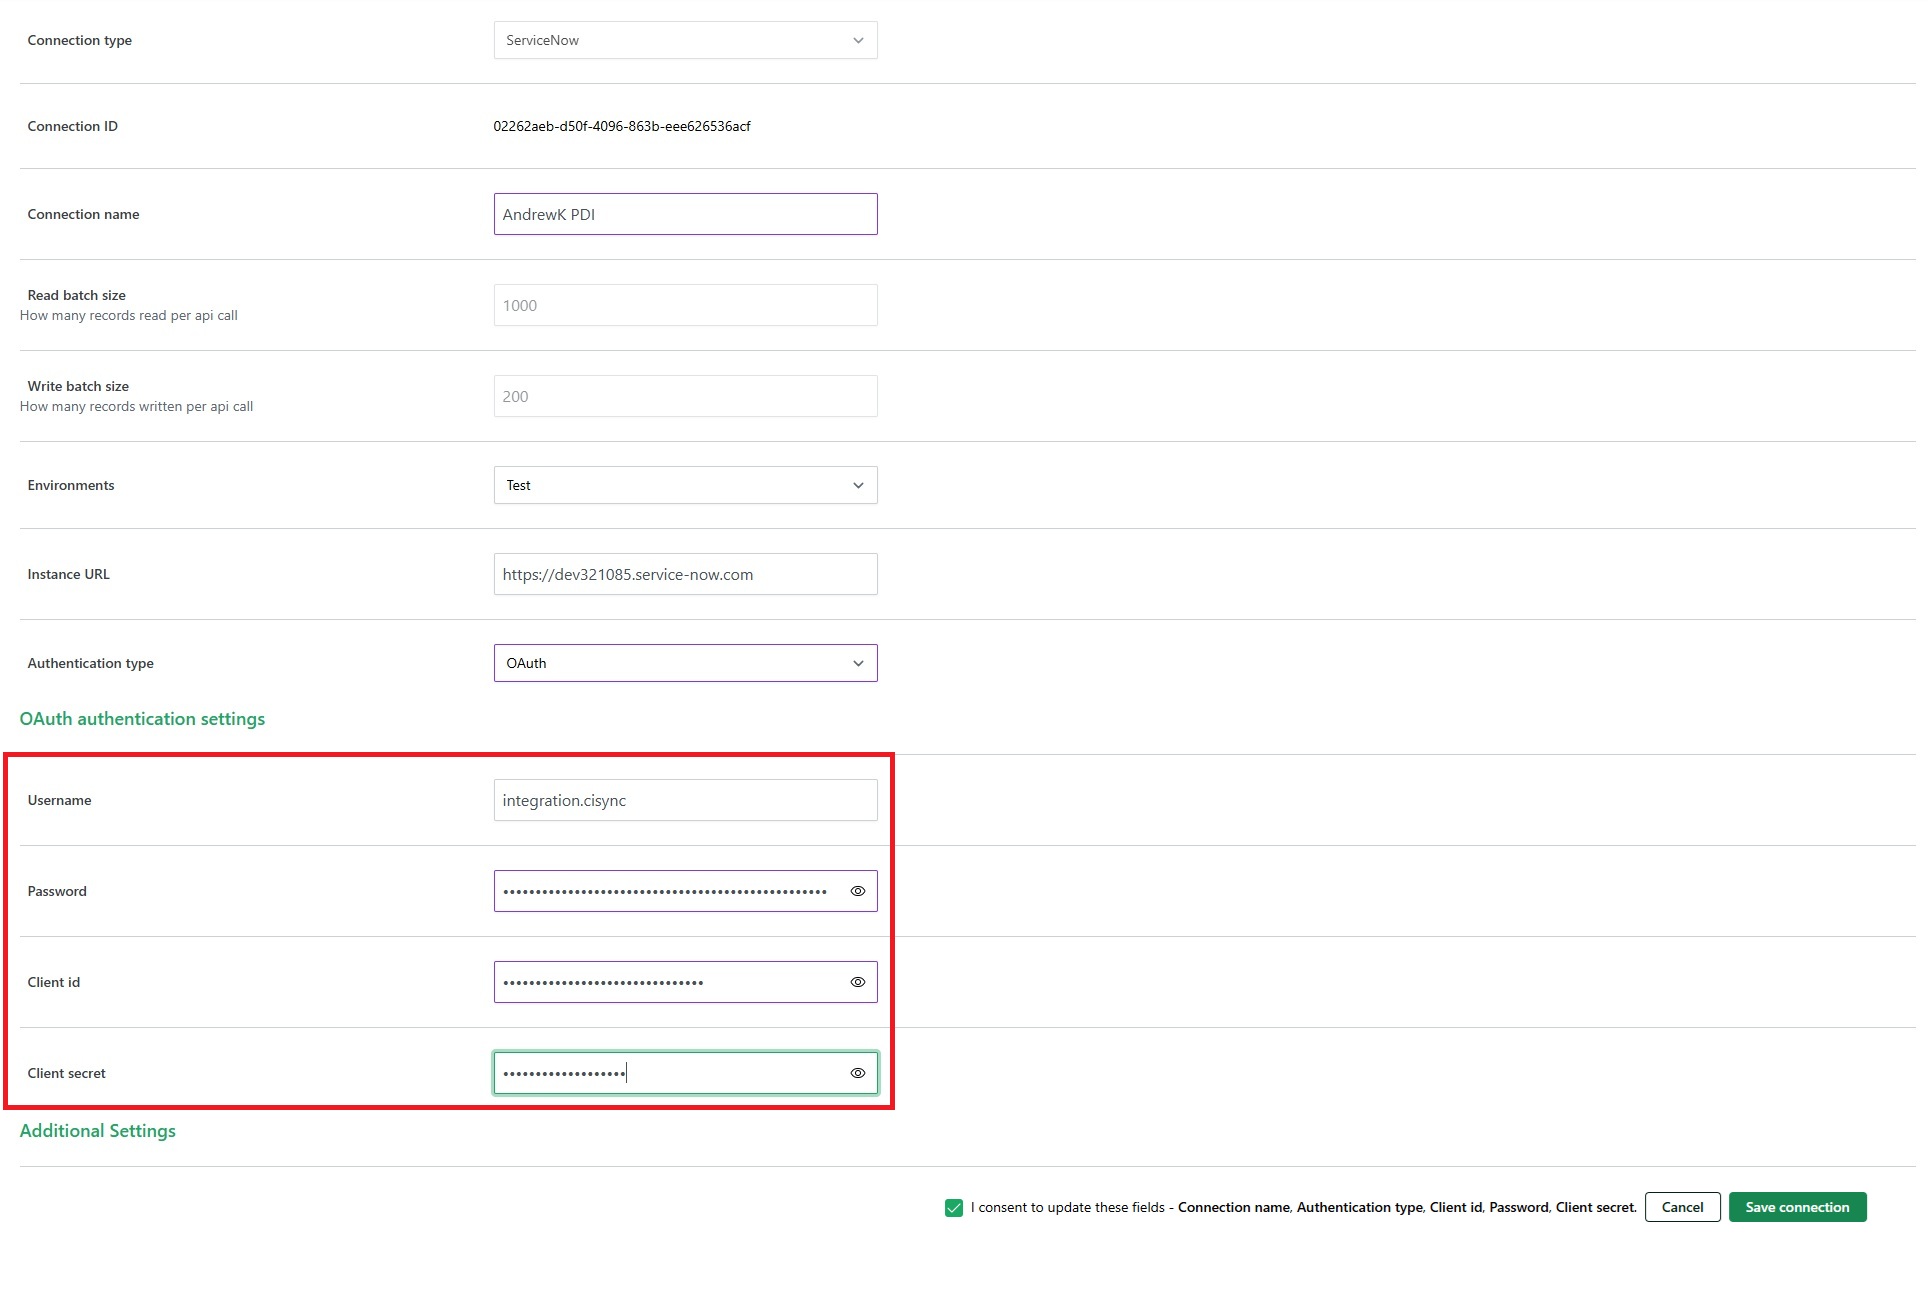
Select OAuth for Authentication type
-
Enter Username, Password, Client id and Client secret (the Client id and Client secret were captured in Task 1 further above).
-
Scroll down and Tick the “I consent…” checkbox.
-
Click Save connection.
-
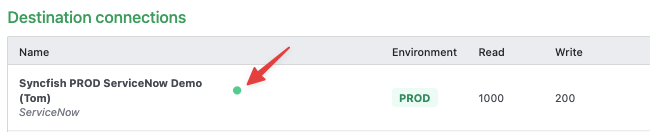
Check for a green health indicator against the ServiceNow connection you just updated.
-
Repeat these steps for each ServiceNow connection.
Related Articles
There are currently no related articles.
Control Information
|
Created |
|
|---|---|
|
Reviewed |
|
|
Data Classification |
PUBLIC
|