Aim
A customer with a CI Sync On-Prem Agent (windows service) running successfully on a server may want to move the agent to another server without re-registering a new agent or its connectors, thus reusing the agent on the new server.
This article explains how to manually migrate the CI Sync On-Prem Agent (windows service) from one server to another.
Though uncommon, this process can be done with manual steps and may sometimes require Syncfish support.
Process
In order to reuse a CI Sync On-Prem Agent, it is recommended to execute some manual steps in the context of each server (“old” and “new”)
We can call the server where the agent is currently running as Old Server and the server where the agent will be migrated to as New Server.
Execute these steps in sequence and in case of difficulties contact Syncfish support.
Old Server steps
-
Stop the CI Sync On-Prem Agent service;

-
Go to the CI Sync On-Prem Agent installation folder and copy the file appsettings.json into a location on the New Server.
The usual default installation folder is C:\Program Files\Syncfish\CISynchronizerAgent\service
-
Regarding the RecVer database(s), consider the following two options to determine what action to take:
Option 1 - The SQL Server hosting the RecVer database(s) will remain as it is, not migrated to a new server
Option 2 - The SQL Server hosting the RecVer database(s) will also be migrated to a new server
Click to expand option 2
Important: The new SQL Server will require to have a server login for the CI Sync agent user as it was originally configured on the Old Server. If you need detailed information regarding the SQL Server requirements and setup as well as further understanding of the RecVer database, you can look for one of your specific connectors on the documentation Add Source System to On-Prem Agent and within the connector documentation look for the task Use the CI Sync Agent Config Utility to Create the Source System Connection with a SQL RecVer DB.
On the new SQL Server, if the customer wants to use the same RecVer databases as per the old server to keep synchronization data, the RecVer databases must be backed up from the old SQL Server and restored into the new SQL Server.
RecVer databases can also be automatically recreated from scratch on the new SQL Server, in this case the RecVer databases don’t need to be backed up from the old server and when executing the Setup & Test for each connector use this RecVer option.
If your new SQL Server has already the registered login for the CI Sync agent user, when restoring a RecVer database into the new server, the agent user login will also need to me mapped to a database user created on the RecVer database.
Here is an example in SSMS:
Figure 1 - The login on the New Server for lsagent has been setup by SQL Server admin
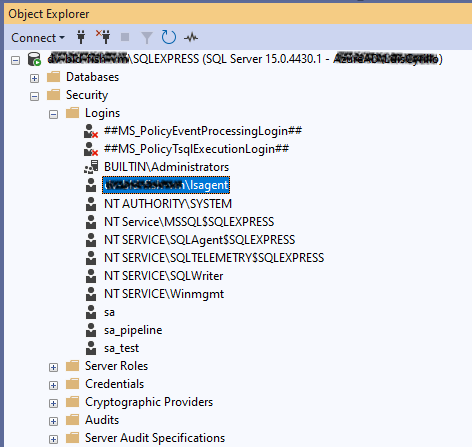
Figure 2 - The RecVer database has been restored and has a reference to the Old Server/user. This database user can be deleted.
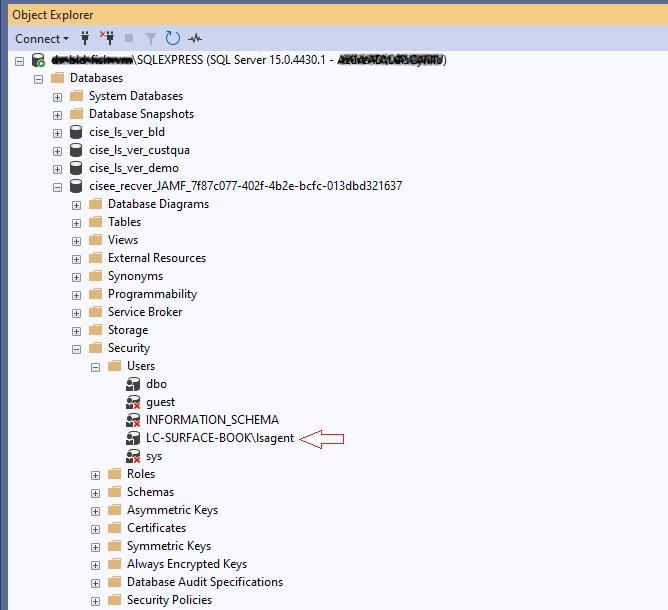
Figure 3 - After deleting the user (e.g. LC-SURFACE-BOOK\lsagent), create a new database user to reference the SQL Server login shown in Figure 1.
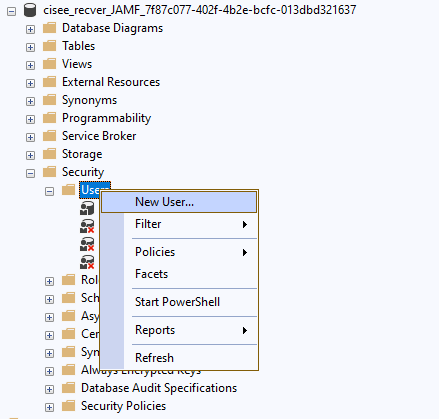
Figure 4 - The user will be mapped to the SQL Server login shown in Figure 1
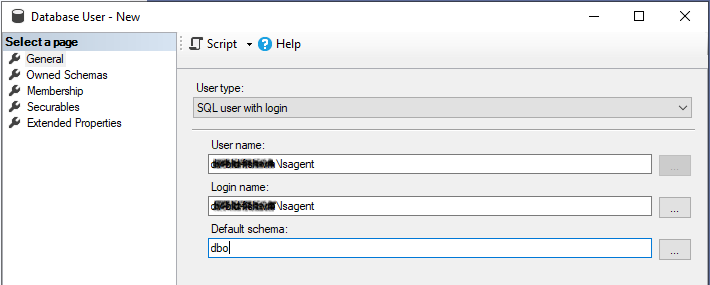
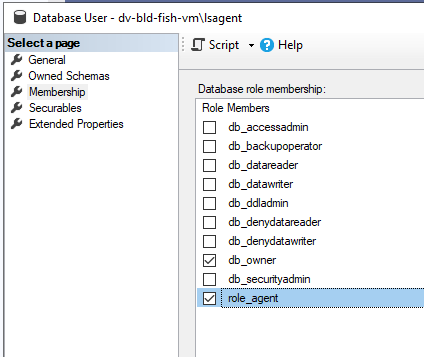
Figure 5 - Set memberships db_owner and role_agent to the new user
New Server steps
Important note regarding passwords and secrets
As the CI Sync On-Prem Agent stores secret values in the Windows Credential Store (WCS), the appsettings.json file contains a reference to the WCS entry rather than the password/secret value itself.
As a consequence, the appsettings file contents moved to the new server will contain references to WCS entries that don’t exist. These password/secret values will need to be re-entered via the CI Synchronizer Agent Config Utility which will store the secret in WCS and update the reference to this new WCS entry in the New Server appsettings file.
This will be applicable when completing the setup on CI Synchronizer Agent Config Utility specifically on field App Registration Client Secret (Configure tab) as well as when editing each connector containing password and/or secret fields (Source Systems tab).
-
Install the CI Sync On-Prem Agent as usual - when the CI Synchronizer Agent Config Utility opens up at the end of installation, do not configure anything - just close the application.
-
Stop the CI Sync On-Prem Agent windows service you just installed.
-
Go to the installation directory of the CI Sync On-Prem Agent and open the appsettings.json file.
-
Copy the following values from the Old Server file (opened in Old Server step 2) into the New Server file:
-
On the Service Configuration node, set the Url value;
-
On the Connections node, set all connections elements from the Old Server file;
-
Clear values of any HmacSecret and HmacExpiryDate (set empty string);
-
Do not change elements AgentServiceName and PipeName - it is important to maintain the the values set during installation on the New Server.
-
Save and close the appsettings.json file.
-
-
Re-start the CI Sync On-Prem Agent service
-
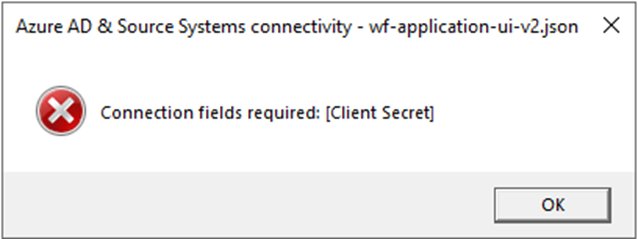
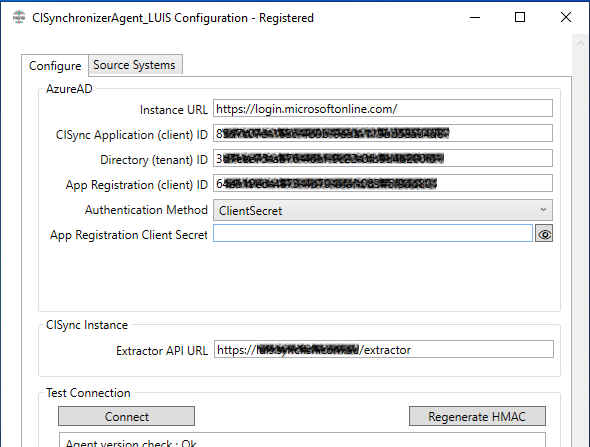
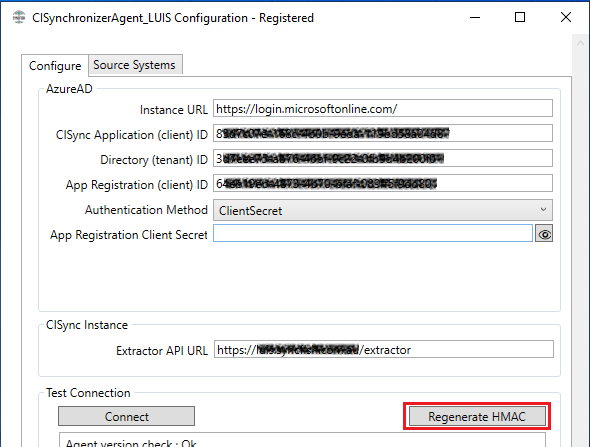
Open the CI Synchronizer Agent Config Utility – as stated in Important note regarding passwords and secrets, it is expected that the application cannot connect due to the App Registration Client Secret is not yet set on the New Server.
-
Enter the App Registration Client Secret and press Connect.
-
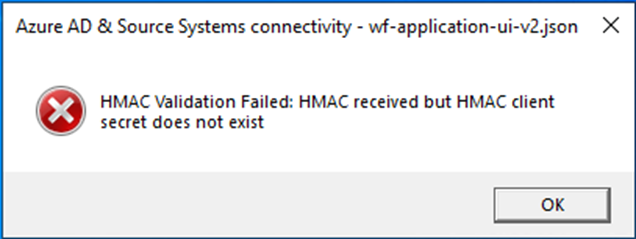
It is expected an error regarding HMAC validation as the HMAC values do not exist in the New Server.
-
Press Regenerate HMAC and follow the instructions to reset HMAC.
-
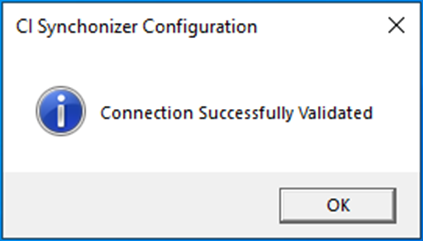
Once HMAC is successfully updated, the CI Synchronizer Agent Config Utility connects successfully
-
On the Source Systems tab, open each connector, update all the relevant fields as required and press Setup & Test - Note: these are the fields expected to be re-entered or reviewed:
-
Secrets and passwords - as stated in Important note regarding passwords and secrets, if the connector was setup with a secret and/or password field, obtain the value to be re-entered in the same manner it was obtained when the connector was originally setup in the Old Server - you may need to contact the system administrator to obtain these values.
-
Cert. Name / Thumbprint - If the connector was setup with authentication using a certificate, it will be required to have the certificate installed in the New Server in the same manner it was installed in the Old Server and the field correctly updated if the certificate name / thumbprint has changed - you may need to contact the system administrator to obtain or install the certificate.
-
SQL Server - Enter the new server in case SQL Server has been migrated to a new server, otherwise the server will remain the same as explained on Old Server step 3 Regarding the RecVer database(s), consider the following two options to determine what action to take.
-
RecVer Database - take action as follow:
-
if SQL Server has NOT been migrated to a new server, leave both options checked Existing RecVer Database and Bypass setup, I have manually setup the databases.
-
if SQL Server has been migrated to a new server, and the RecVer datatabase has been restored from a backup, check Existing RecVer Database and uncheck Bypass setup, I have manually setup the databases as explained on Old Server step 3 Regarding the RecVer database(s), consider the following two options to determine what action to take.
-
If SQL Server has been migrated to a new server, and the RecVer database has not been restored from a backup, it can be automatically created by unchecking both Existing RecVer Database and Bypass setup, I have manually setup the databases.
-
-
-
After all connectors have been successfully updated by Setup & Test, the CI Sync On-Prem Agent is operational on the New Server.
At any step of the migration process, Syncfish support can be contacted to assist.
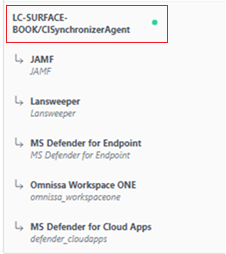
Once the CI Sync On-Prem Agent is operational on the New Server you may notice that on the CI Sync Web application, the agent will appear with the Old Server name.
This does not interfere with the CI Sync On-Prem Agent functionality and currently can only be updated by Syncfish support.

Related Articles
There are currently no related articles.
Control Information
|
Created |
|
|---|---|
|
Reviewed |
|
|
Data Classification |
PUBLIC
|