
Aim
Enabling detailed CI Sync Agent logs will assist in diagnosing issues with Synchronization jobs.
Process
Enable detailed logging
To generate detailed logging complete the following steps:
-
On the CI Sync agent machine:
-
Stop the CISynchronizerAgent service.
-
Open the appSettings.json file in Notepad. The file should be at: C:\Program Files\Syncfish\CISynchronizerAgent\service
-
Take note of the current settings for the below as you will want to revert back to them later:
-
Change the "FileLogLevel" to "Verbose" (record the previous value first)
-
Change the "WorkflowLogLevel" to "Task" (record the previous value first)
-
Save the changes to the appsettings.json file.
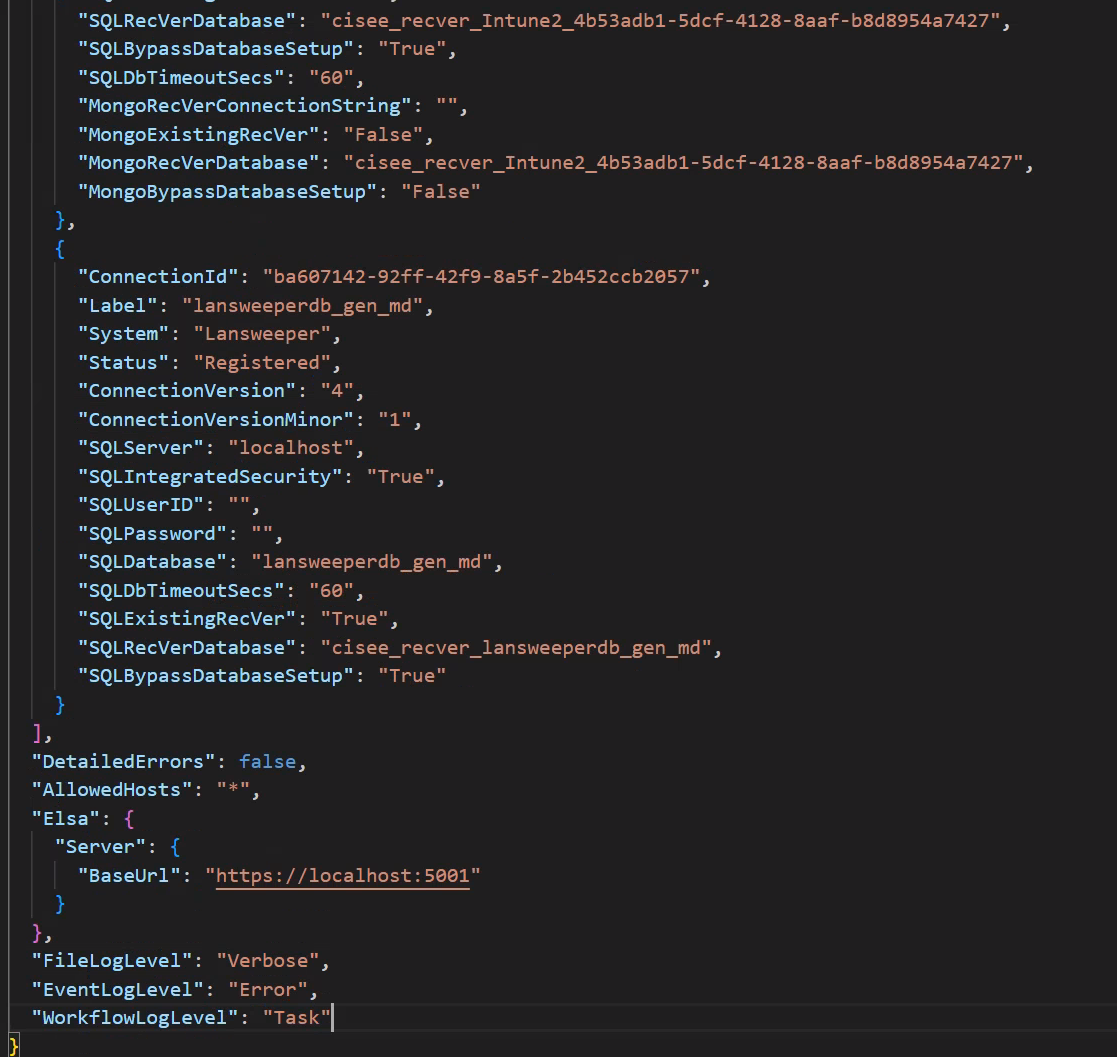
g. Start the CISynchronizerAgent service.
-
-
In the CI Sync UI:
-
Re-run the job in question but only sync the record set of concern to minimize the size of the log output file. CI Sync will also pre-select any dependant record sets that may also be required.
-
For example, to diagnose VMware relationships you would make the following selections in the Run UI.
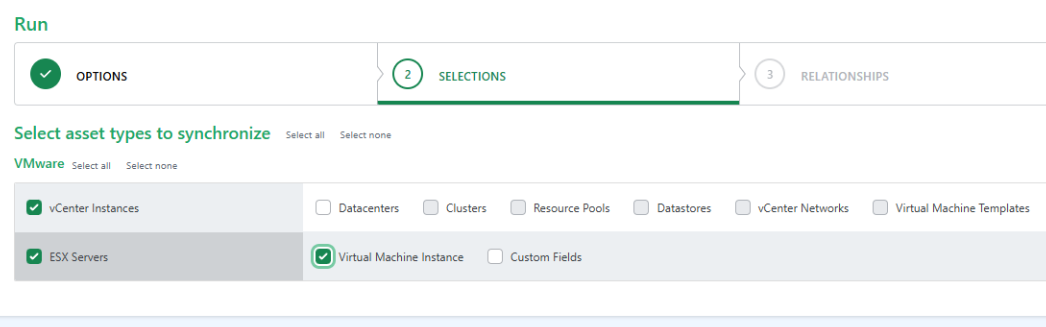
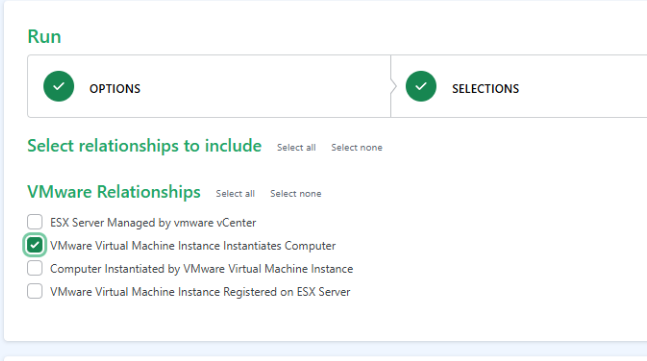
-
-
On the CI Sync agent machine:
-
Revert the Agent "FileLogLevel" and "WorkflowLogLevel" values back to their previous configuration.
-
Navigate to the logs directory.
It should be at: C:\Program Files\Syncfish\CISynchronizerAgent\service\logs -
Zip up the contents of the logs directory, including the ExecutionLogs and Instances sub folders
-
Attach the zip file to the SUP ticket for analysis.
-
More information
N/A
Related Articles
There are currently no related articles.
Control Information
|
Created |
|
|---|---|
|
Reviewed |
|
|
Data Classification |
PUBLIC
|