Aim
ServiceNow Application Service Mapping can be achieved through the entry of Service Numbers against Azure resources using a Tag. This procedure defines how to Tag Azure resources and configure CI Sync to synchronize the Tag values into ServiceNow as relationships to an Application Service to trigger the Application Service Mapping.
Process
The overall process for Application Service Mapping is as follows:
-
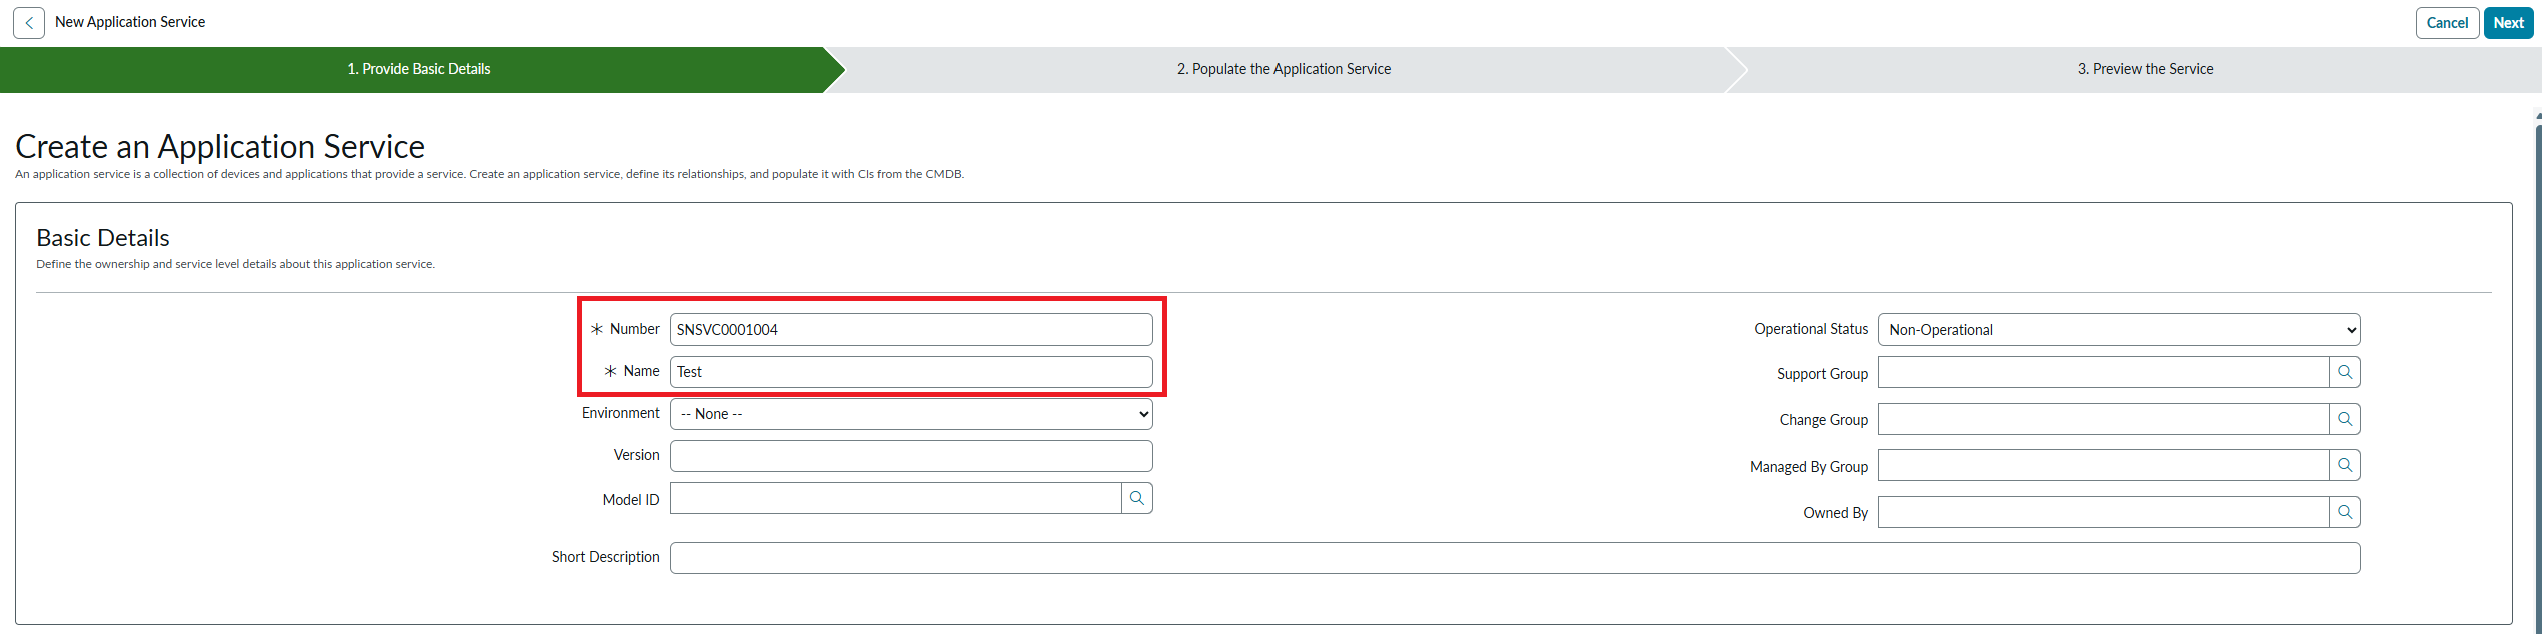
In ServiceNow, create an Application Service Record by navigating to the cmdb_ci_service_auto table and click New.
Give the new Application Service a Name.
Take note of the Service Number that is generated then click Next.
Click Choose a Method.

Select Dynamic Service and choose the number of levels of related CIs to include in the Application Service.
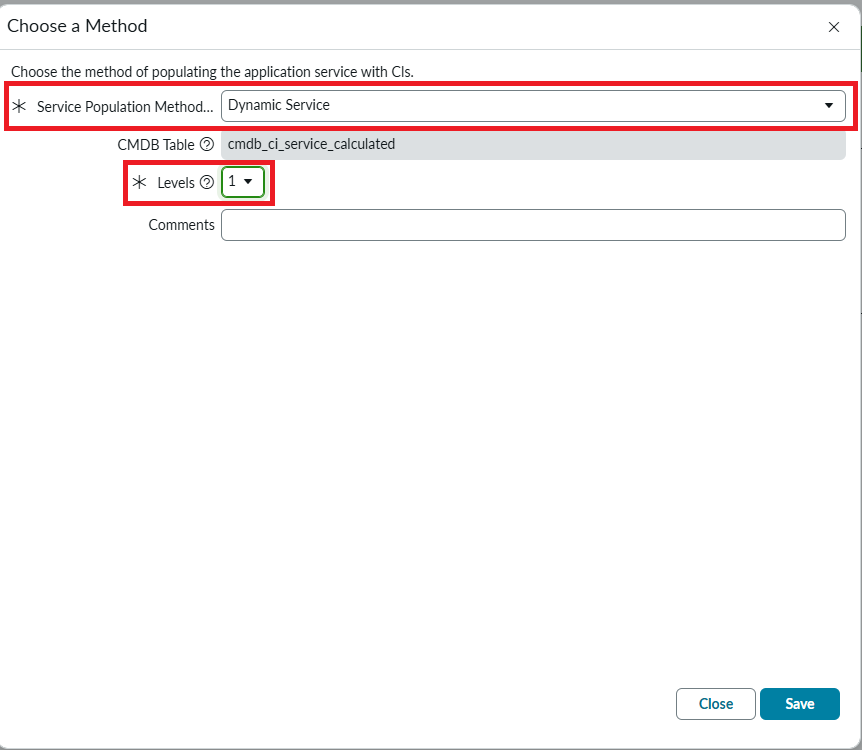
Then click Save.
Click Next.
Click Done.
-
In Azure, Populate the Tag for the Azure resource that represents the entry point for the application.
-
In CI Sync, enable Application Service Mapping against the Azure Source connection and configure the name/s of the tag that will contain the Service Number. NB: this is a one-time configuration.
-
In CI Sync, run a synchronization job including the resource/s and the “Application Service Mapping” recordset.
-
CI Sync will create a relationship between the Tagged resource and the Application Service which will trigger ServiceNow to generate the Application Service Map.
-
Azure
Configuration
There is no configuration required in Azure to utilize this functionality. However, the tag name used for defining the Service Number should be consistent.
Setting the Service Number
Set the Service Number value against a Tag. In the following example the Tag name “service_number“ has been used, but any tag name can be utilised:
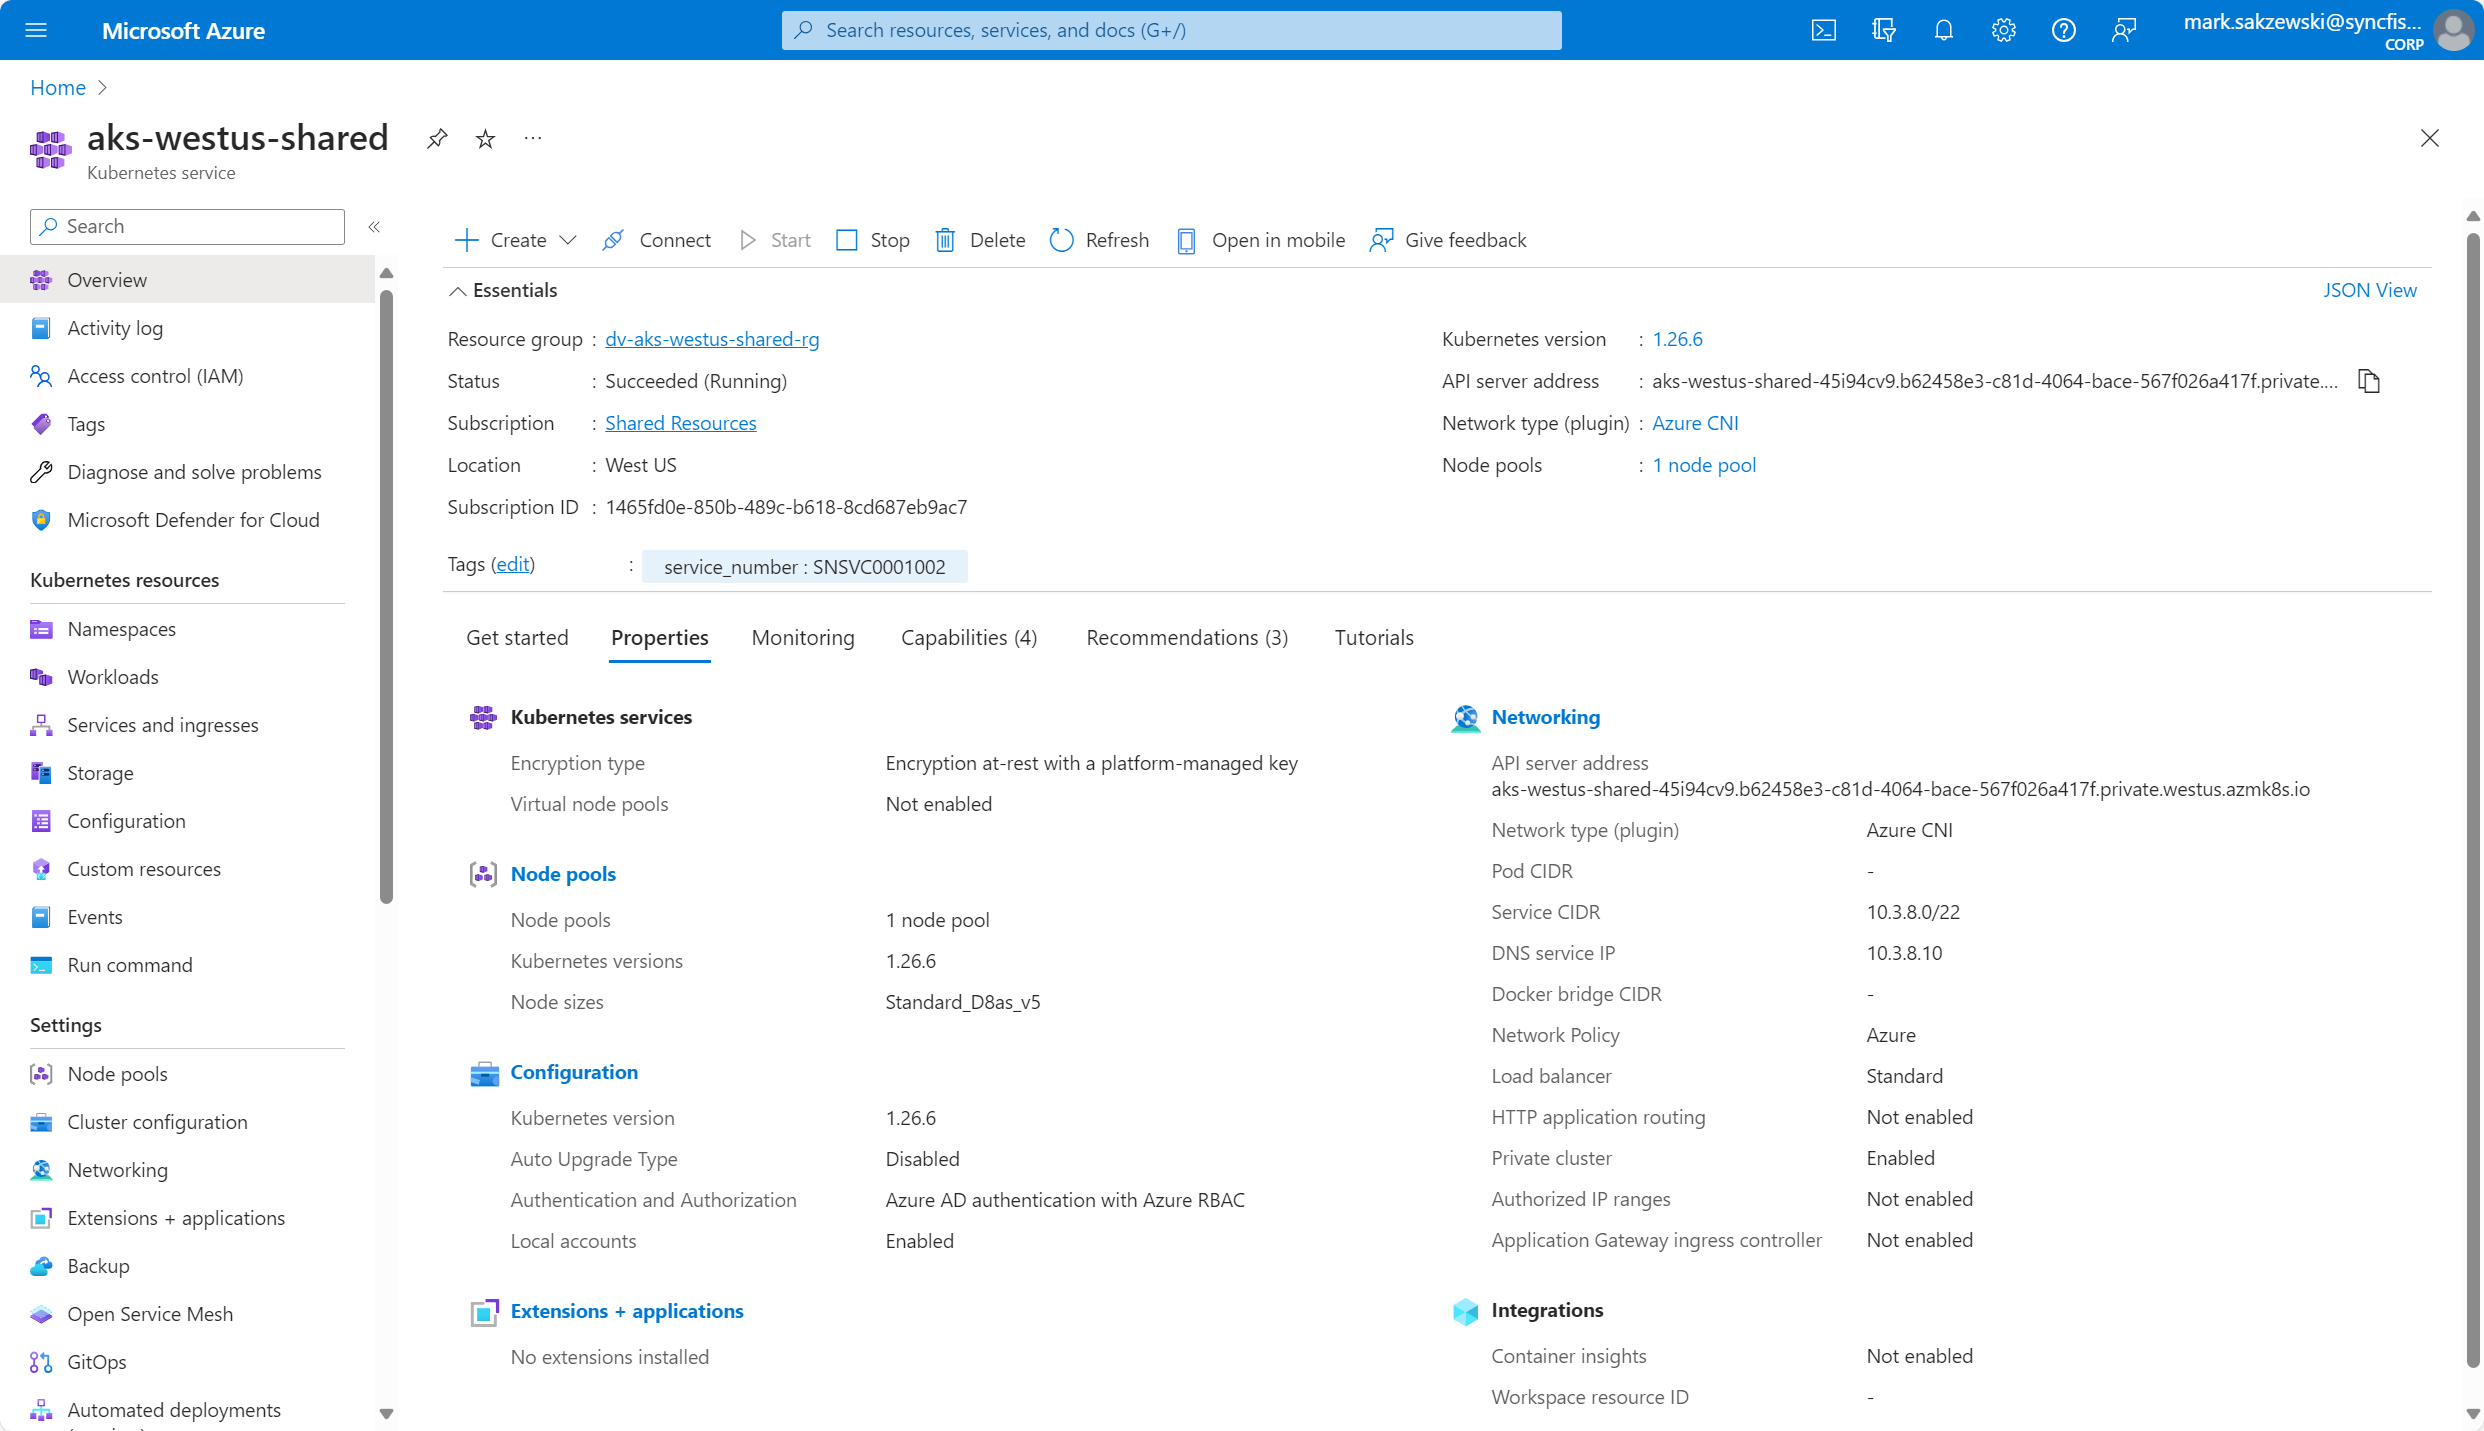
You can enter multiple comma separated Service Numbers within a given tag. CI Sync will split the comma separated values when searching for the corresponding Service Numbers in ServiceNow.
CI Synchronizer
Configuration
-
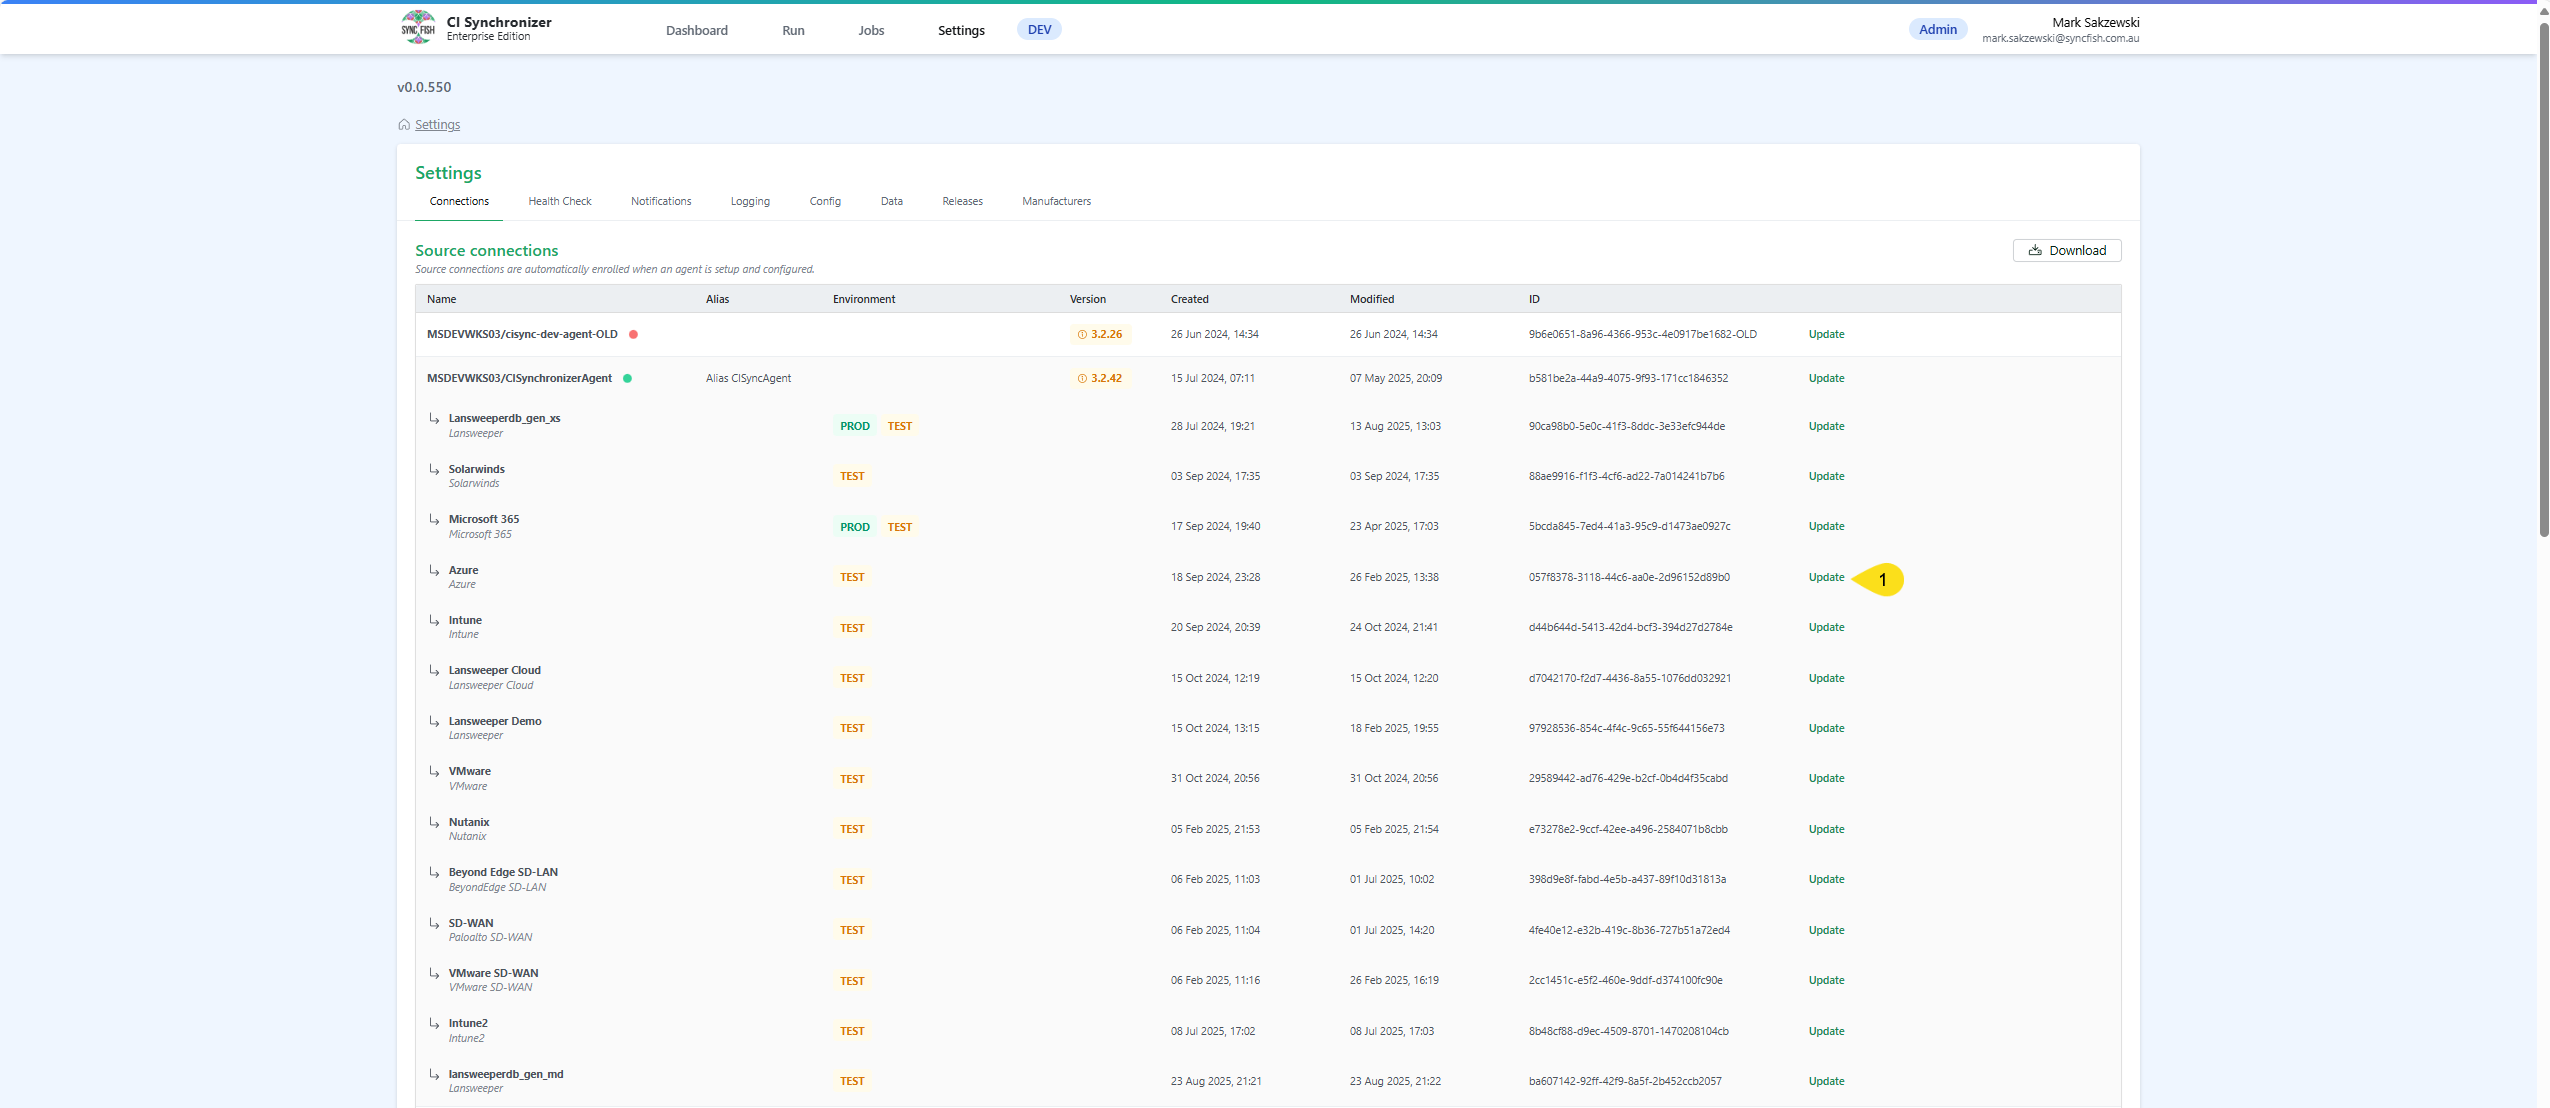
In CI Sync, navigate to settings and locate the source connection that corresponds to your Azure instance and click the Update link:
-
Under the Additional settings section, enable the Application Service Mapping and configure:
-
Service Number Tag RegEx: {a Regular Expression that matches the name/s of the tags in Azure} (e.g. “service_number” will match on tags named “service_number”. e.g. “service_number|service_no” will match on tags named either “service_number” or “service_no”)

-
-
Scroll to the bottom of the screen, tick the confirmation checkbox and click the Save connection button.
Synchronizing
When running a job, select the “Application Service Mapping“ recordset, which is located at the bottom of the Selections page (i.e. on Step 2 “Selections”).
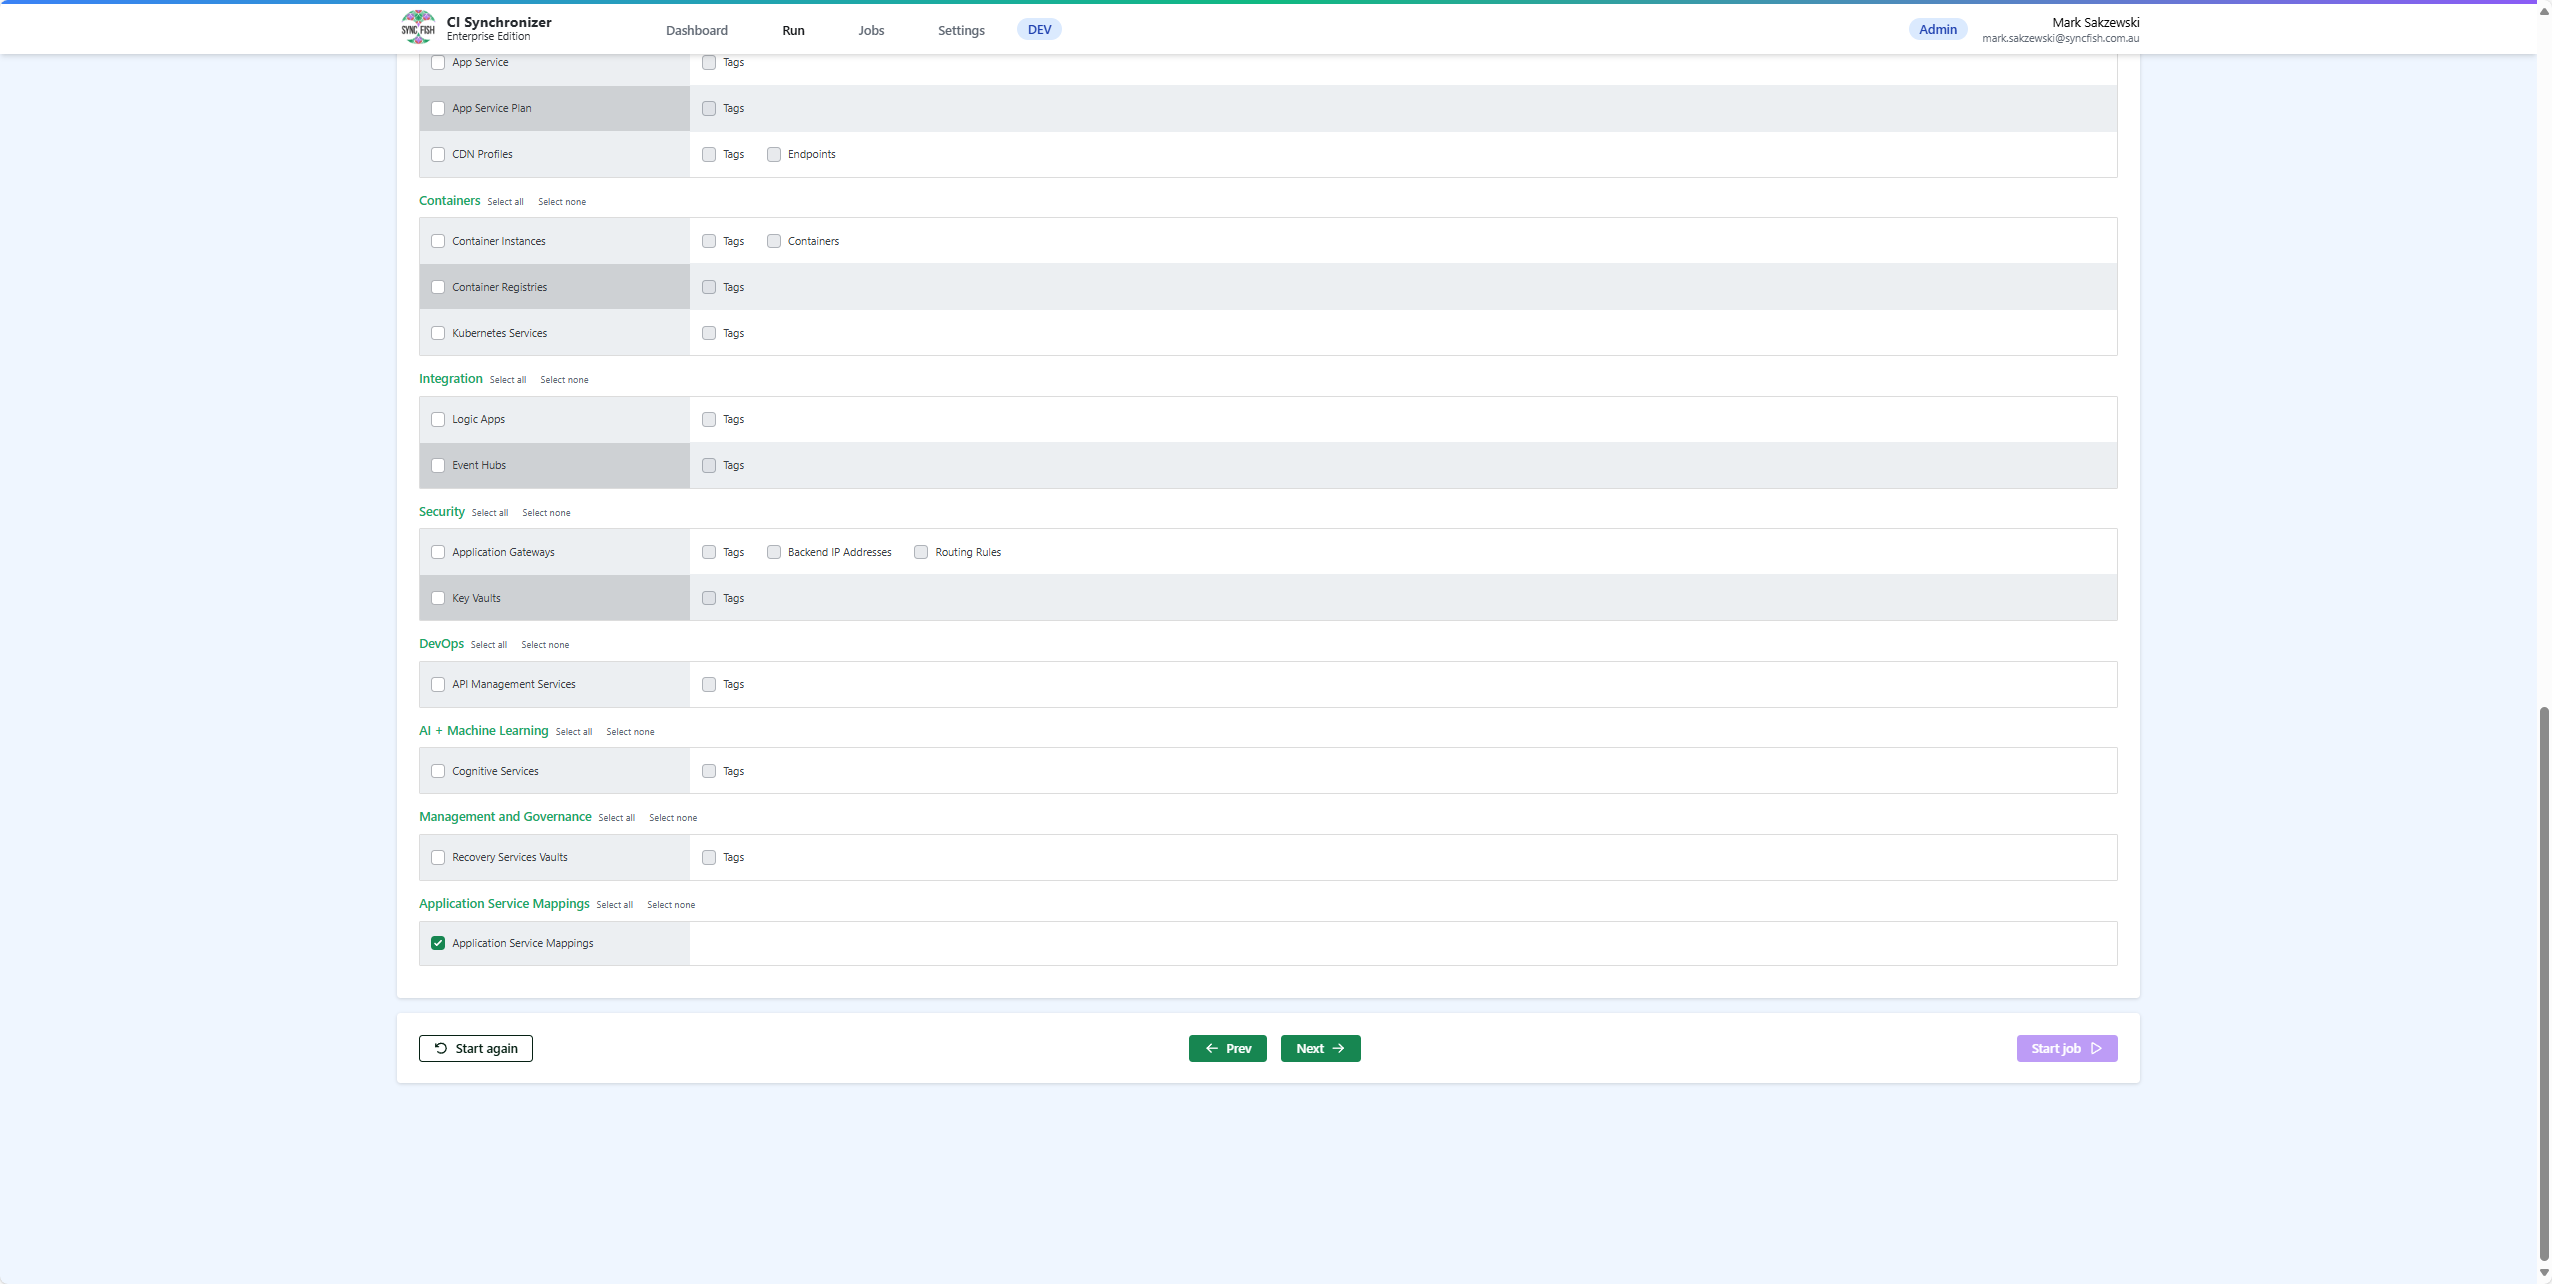
Make sure you also select the recordset/s corresponding to the resources you have entered Service Number values against. If the subject asset hasn’t been previously synchronized, CI Sync will not be able to create the relationship between the asset and the Application Service.
Note: Don’t worry if you synchronize without selecting the correct recordset/s, you can run the job again and any of the application service mapping records that were ignored will be automatically re-processed.
Related Articles
There are currently no related articles.
Control Information
|
Created |
|
|---|---|
|
Reviewed |
|
|
Data Classification |
PUBLIC
|