Aim
ServiceNow Application Service Mapping can be achieved through the entry of Service Numbers against Lansweeper assets using a custom field. This procedure defines how to configure Lansweeper and CI Sync to synchronize the custom field values into ServiceNow as relationships to an Application Service to trigger the Application Service Mapping.
Process
The overall process for Application Service Mapping is as follows:
-
In ServiceNow, create an Application Service Record
-
Set the Service Population Method to “Dynamic Service”
-
Take note of the Service Number that is generated
-
-
In Lansweeper, Populate either:
-
a Custom field AND/OR:
-
a Registry entry value
for the device that represents the entry point for the application. -
NB: Custom fields can be used when you wish to manually populate the value in Lansweeper, whereas registry entries can be used when a deployment process will set the registry value on provisioning of the device.
-
-
In CI Sync, enable Application Service Mapping against the Lansweeper Source connection and configure either/or:
-
The name of the Custom Field that will contain the Service Number.
-
A like expression for the Registry Key and Name to match the registry key that will contain the Service Number.
-
NB: this is a one-time configuration.
-
-
In CI Sync, run a synchronization job including the resource/s and the “Application Service Mapping” recordset.
-
CI Sync will create a relationship between the resources with matching custom fields or Registry Entries and the Application Service which will trigger ServiceNow to generate the Application Service Map.
-
Lansweeper
Requires SQL Server 2016+ (STRING_SPLIT function). Check the Compatibility Level for the Lansweeper Database.
Configuration to use Custom Fields
In Lansweeper, navigate to:
-
Configuration
-
Asset Pages
-
Scroll to the bottom of the screen where the Asset Custom Fields can be edited:
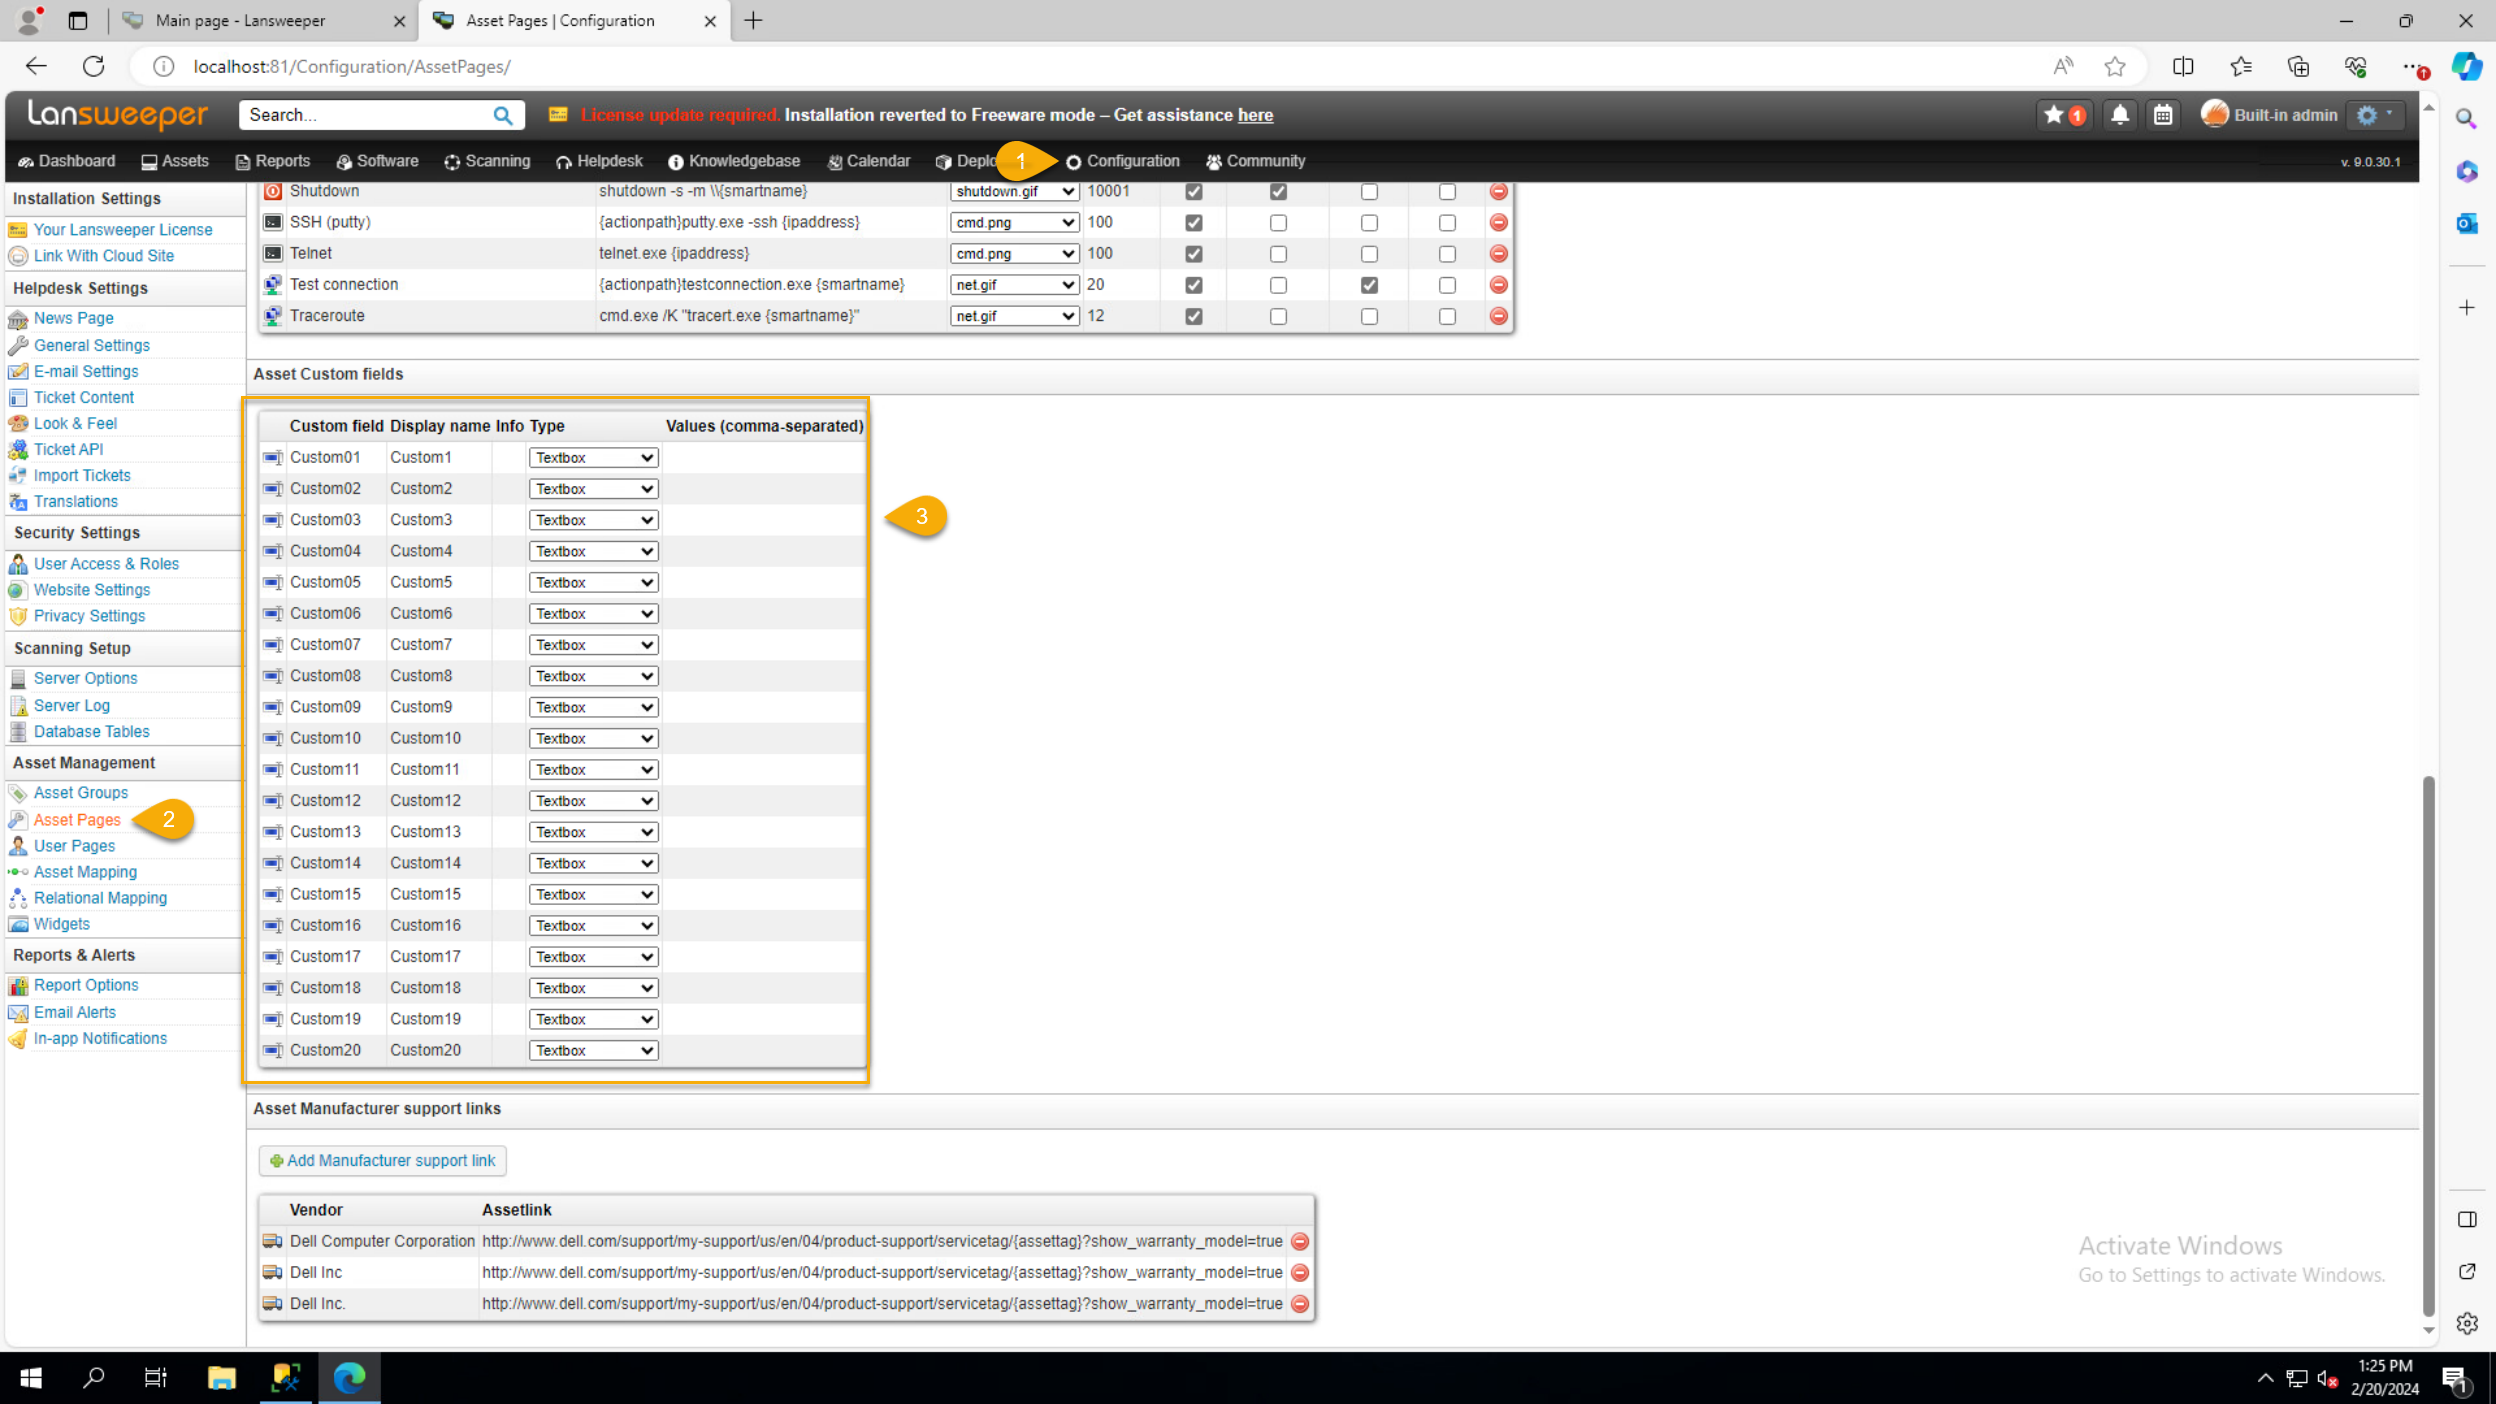
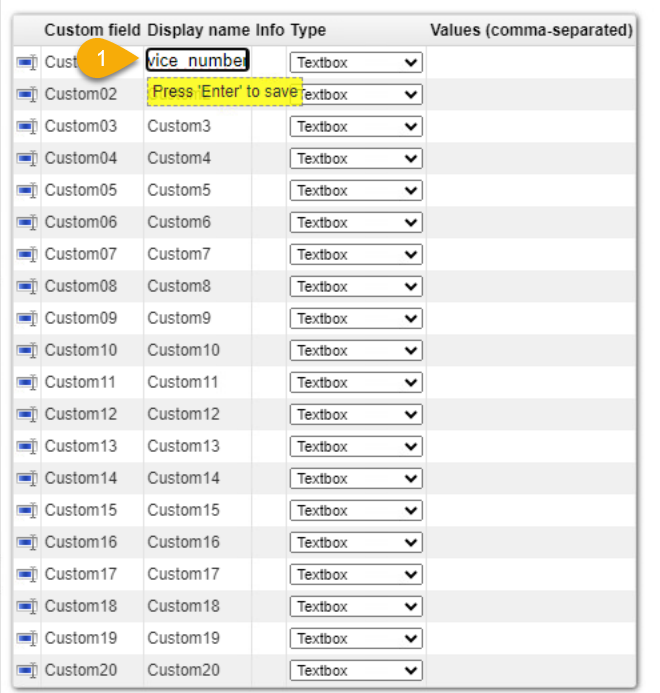
Choose which custom field you want to use to store the Service Number value from ServiceNow, click in the Display name cell and enter the name that will be used to identify the field (e.g. “service_number”). Leave the Type as Textbox.
Set the Service Number Values
Locate the asset that defines the entry point for the Application Service you want to map from ServiceNow.
-
Click the Edit asset menu:
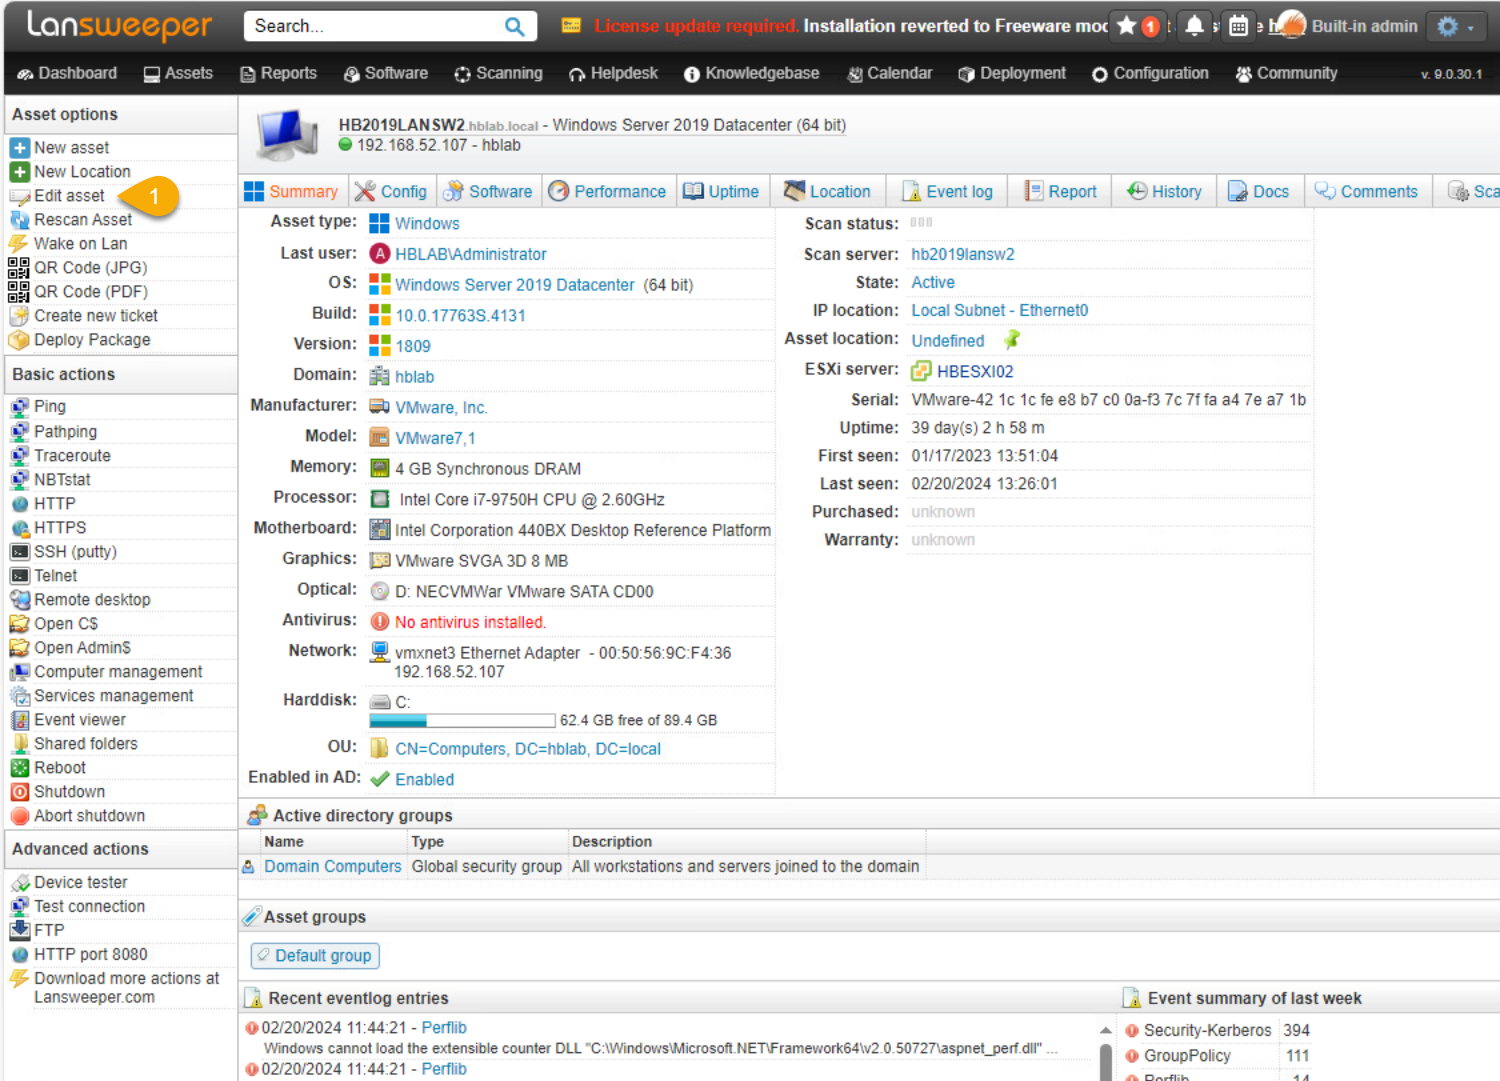
-
Enter the Service Number value from the ServiceNow Application Service record into the custom field configured in the above steps and click the Save asset menu item:

You can enter multiple comma separated Service Numbers within a given Custom Field. CI Sync will split the comma seprated values when searching for the corresponding Service Numbers in ServiceNow.
Configuration to Use Registry Entries
Add the registry keys to the settings for Lansweeper to include them in the scan
CI Synchronizer
Configuration
-
In CI Sync, navigate to settings and locate the source connection that corresponds to you lansweeper instance and click the Update link:
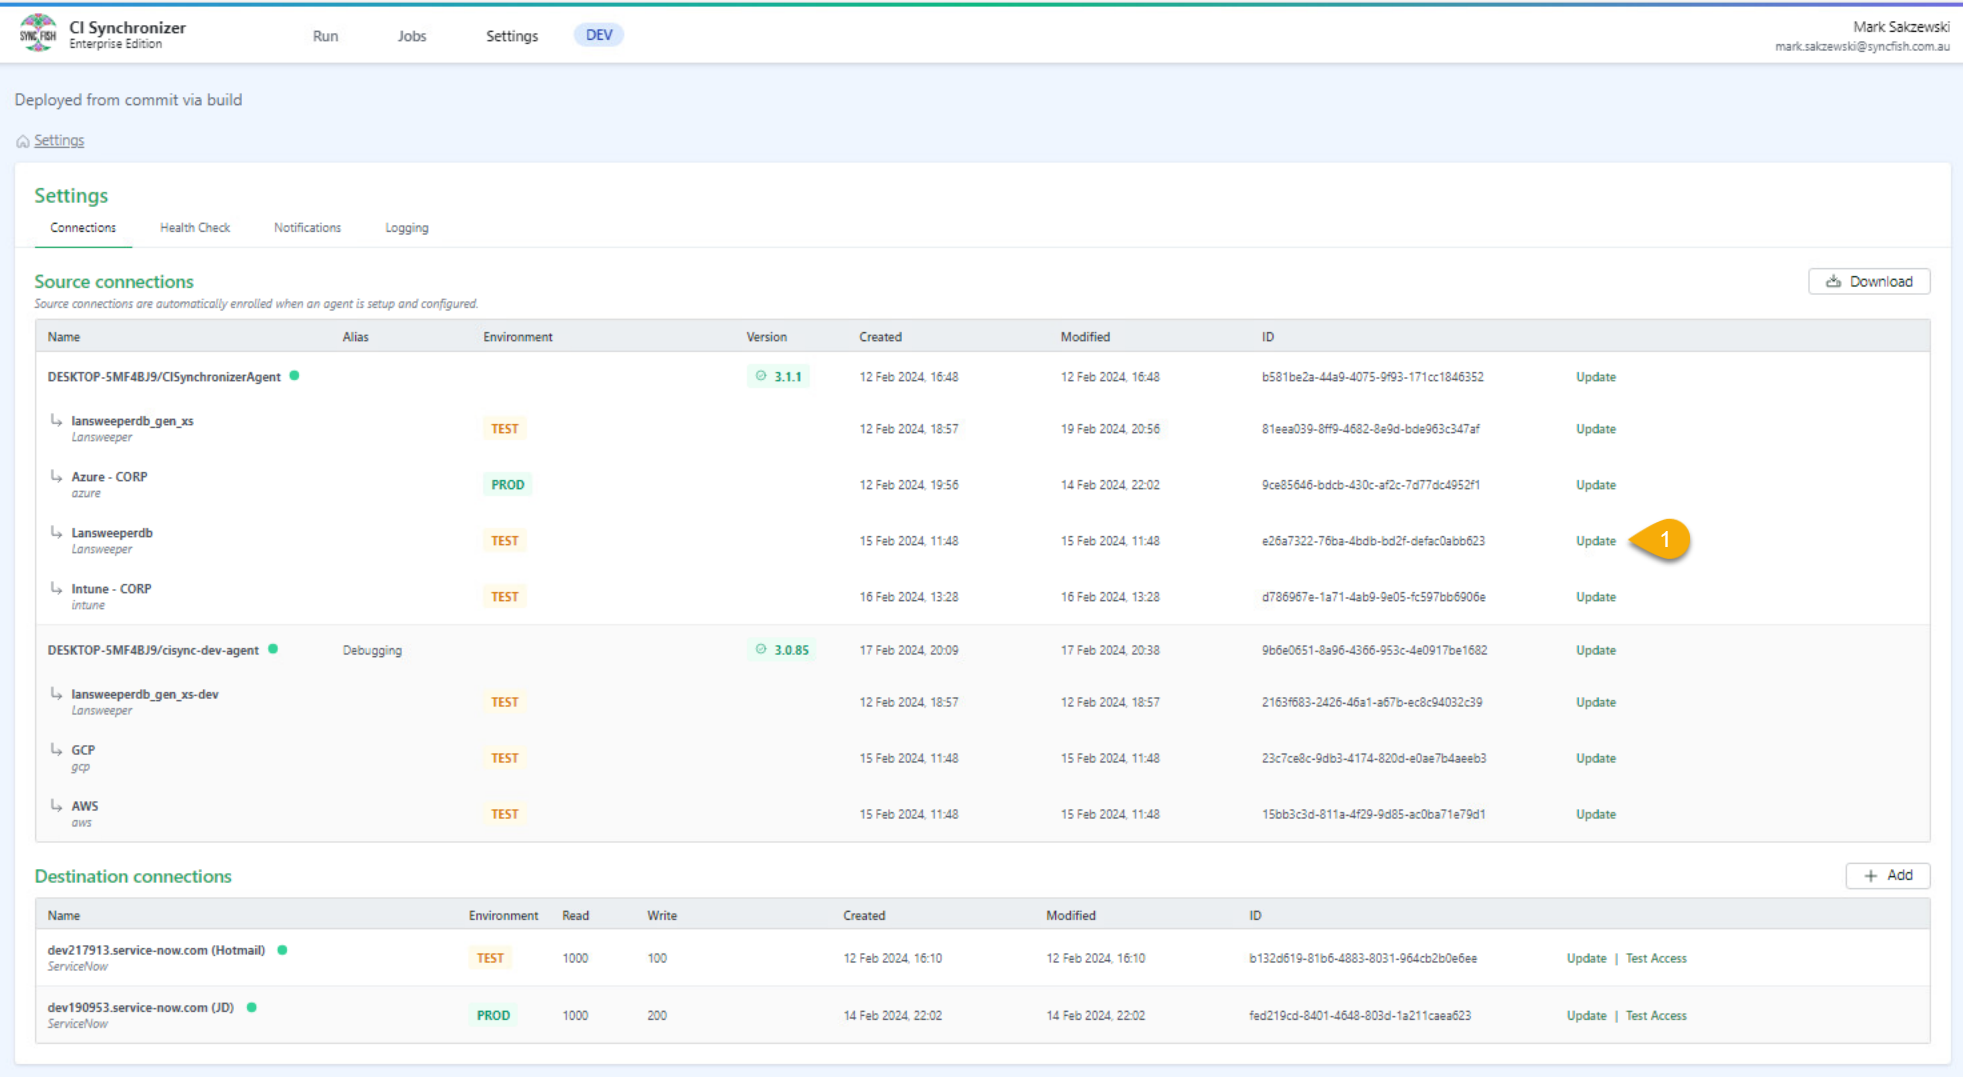
-
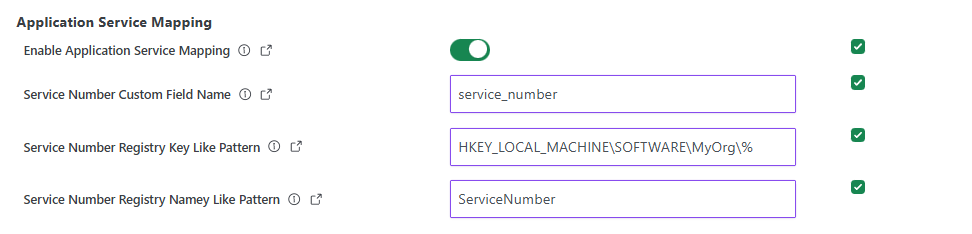
Under the Additional settings section, enable the Application Service Mapping and configure:
-
If you are wanting to use Custom Fields as the source of the Service Numbers:
-
Service Number Custom Field Name: {the name of the custom field in Lansweeper} (e.g. “service_number”)
-
-
If you are wanting to use Registry Keys as the source of the Service Numbers:
-
Service Number Registry Key Like Pattern: {a SQL like patten to match against the registry key} (e.g. “HKEY_LOCAL_MACHINE\SOFTWARE\MyOrg\%” will match any registry key at or below “HKEY_LOCAL_MACHINE\SOFTWARE\MyOrg\”)Service Number Registry Name Like Pattern: {a SQL like pattern to match against the registry name} (e.g. “ServiceNumber” will match on registry names that equal “ServiceNumber”).
-
-
-
Scroll to the bottom of the screen, tick the confirmation checkbox and click the Save connection button.
Synchronizing
When running a job, select the “Application Service Mapping“ recordset, which is located at the bottom of the Selections page (i.e. on Step 2 “Selections”).
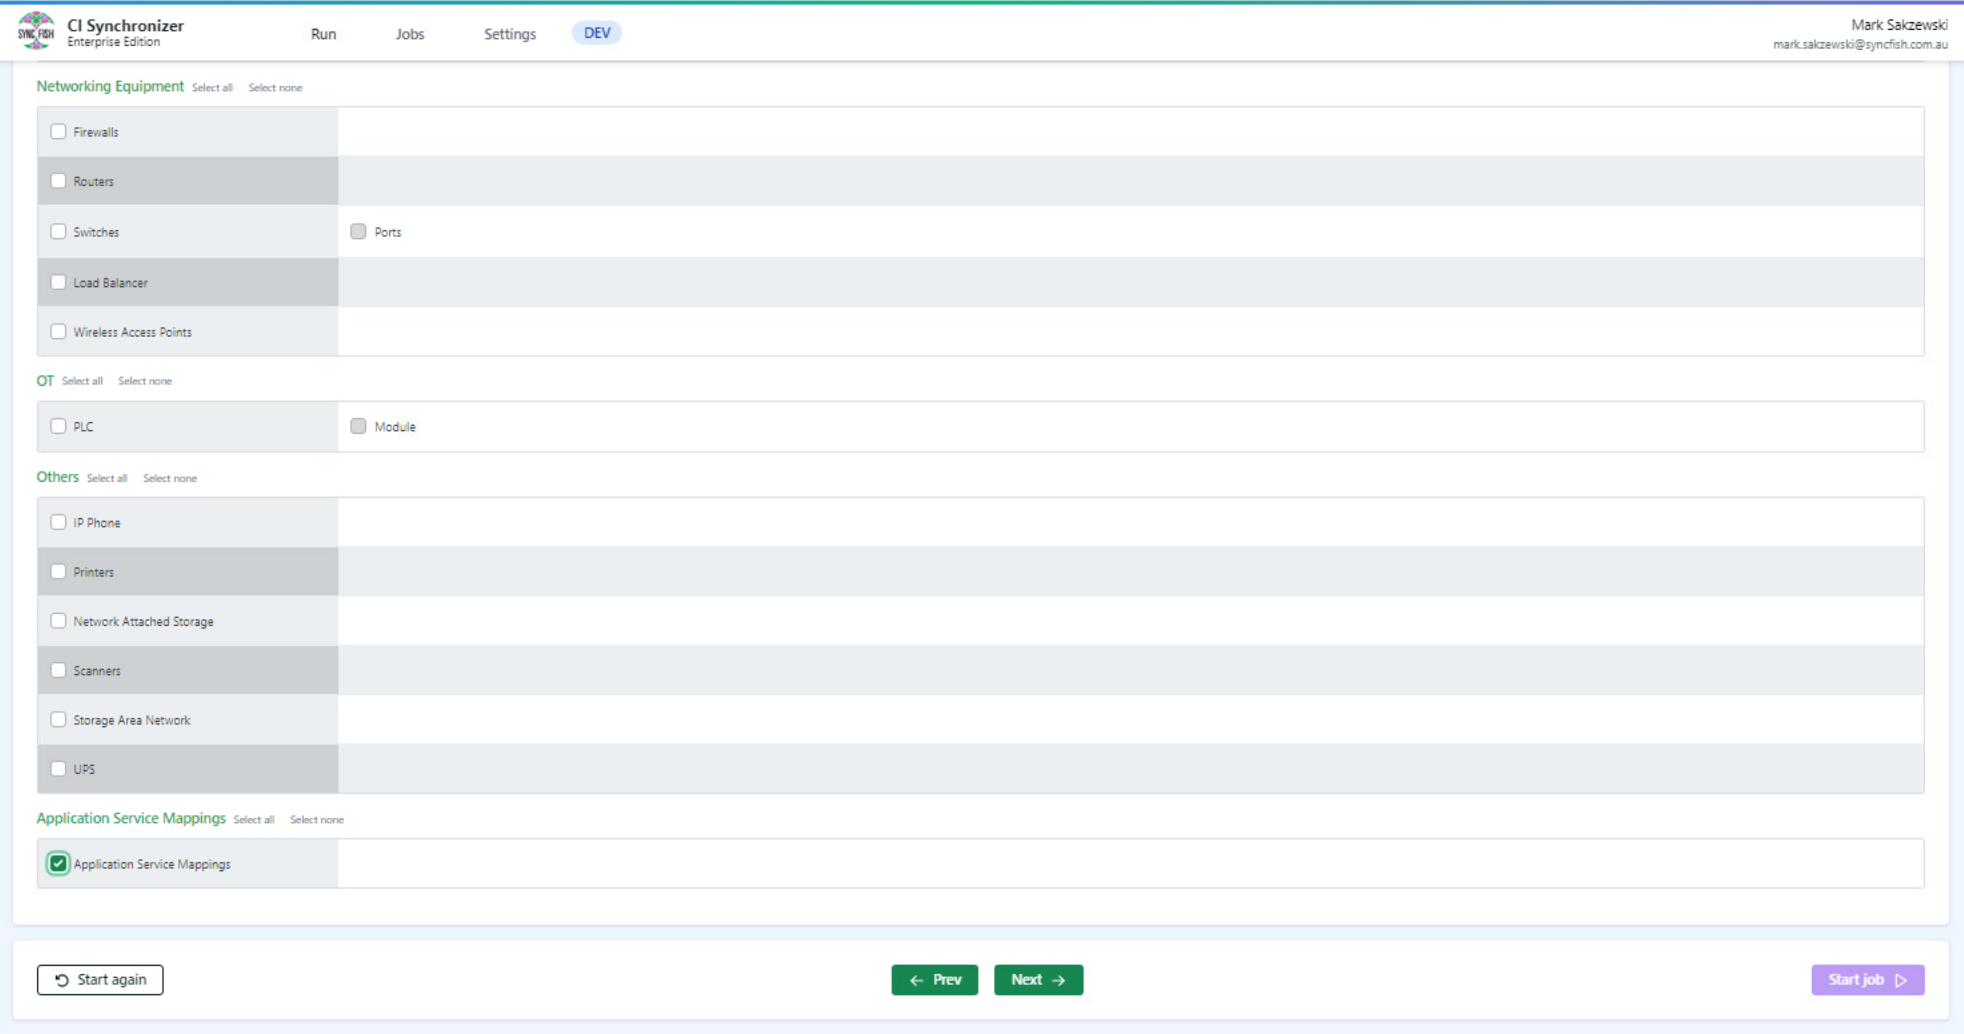
Make sure you also select the recordset/s corresponding to the assets you have entered Service Number values against. If the subject asset hasn’t been previously synchronized, CI Sync will not be able to create the relationship between the asset and the Application Service.
Note: Don’t worry if you synchronize without selecting the correct recordset/s, you can run the job again and any of the application service mapping records that were ignored will be automatically re-processed.
Related Articles
There are currently no related articles.
Control Information
|
Created |
|
|---|---|
|
Reviewed |
|
|
Data Classification |
PUBLIC
|