Task 1: Create new client secret for Azure source connection
Context Notes
The App Registration referred to in this document relates to the Azure Source Connection created within the CI Sync Agent.
This Azure specific App Registration is different (and unrelated) to the App Registration for the CI Sync Agent itself.
-
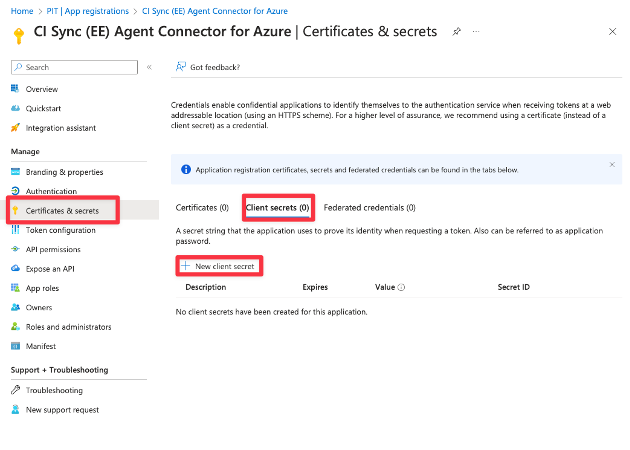
In the Azure Portal, navigate to Azure Active Directory -> App Registrations
-
Select the CI Sync (EE) Agent Connector for Azure
-
Using the left-hand menu, navigate and select Certificates & secrets. Select “Client secrets (1)” in the middle of the form and then click the “New client secret” button. n.b. the existing expired client secret should be visible.
-
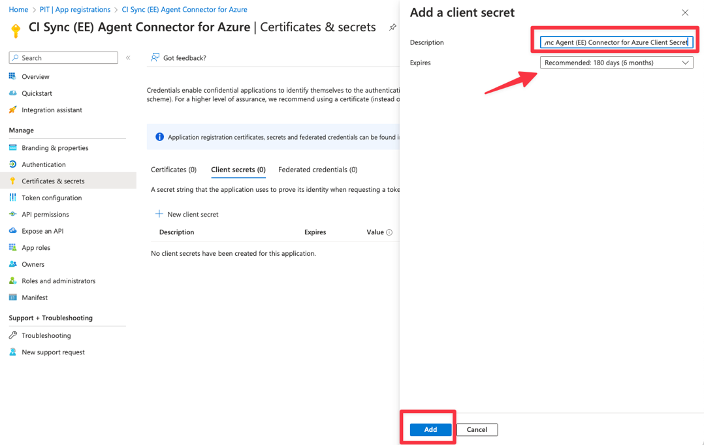
Enter a unique Description for the secret associated with this CI Sync Agent Connector for Azure App Registration (e.g. “CI Sync Agent Connector for Azure Client Secret”).
-
Then, select a suitable Expires duration based on your organizational policy. Finally click the Add button.
Guidance Note
It is recommended you set a reminder prior to the expiry date of the Secret (i.e. a reminder to regenerate and update the Secret in the CI Sync Agent configuration.
-
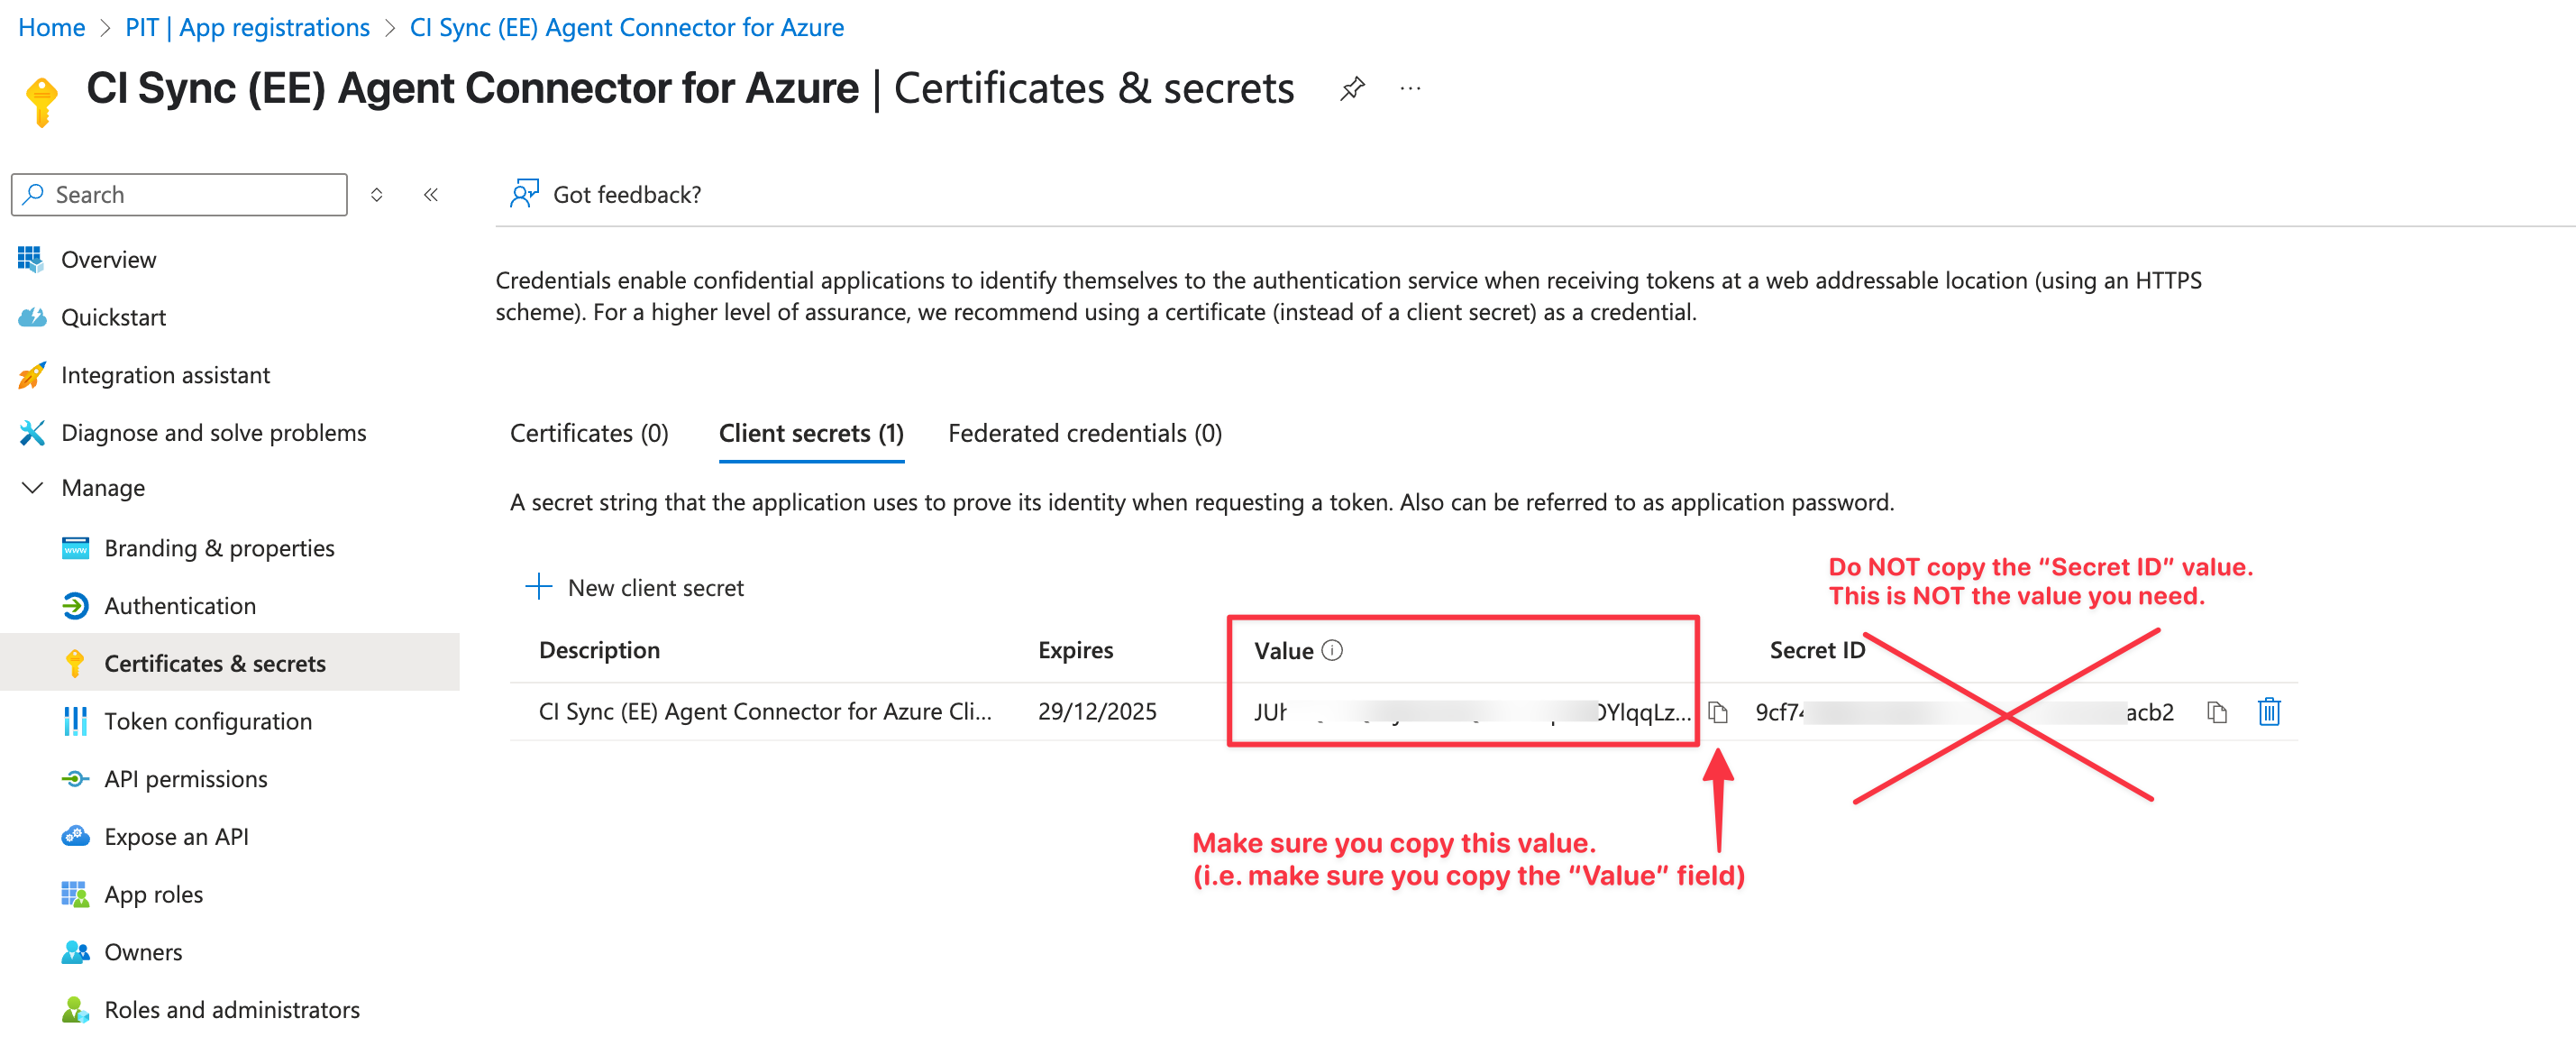
The form now displays the newly generated secret value (shown in the Value field). Use the copy option to make a copy of the value in the Value field.
Data Capture Note
-
The Value is only available while you remain on this screen. You must make a copy of the Value before leaving this form.
-
Make sure you copy the “Value” and NOT the “Secret ID”.
Task 2: Update the client secret for Azure source connection in the CI Sync Agent Config Utility
-
On the server where the CI Sync Agent is installed (referred to as the “CI Sync Agent Server”).
-
Locate and run the “CISynchronizerAgent Config Utility” program.
-
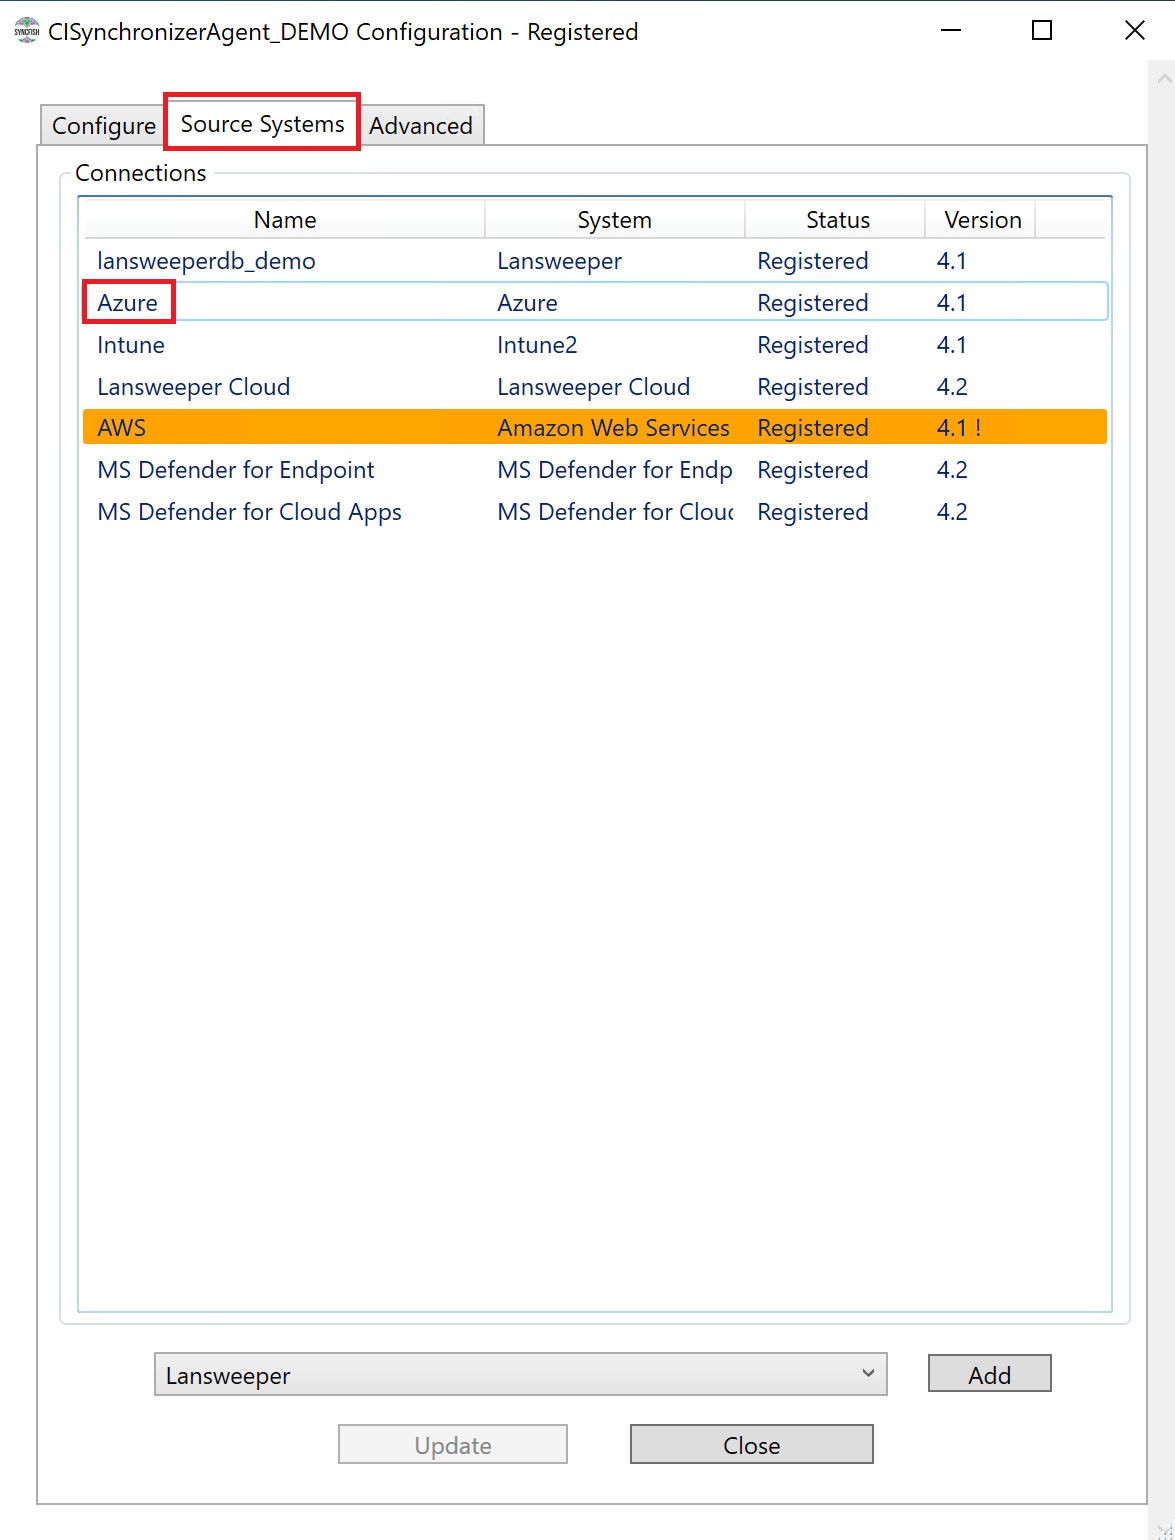
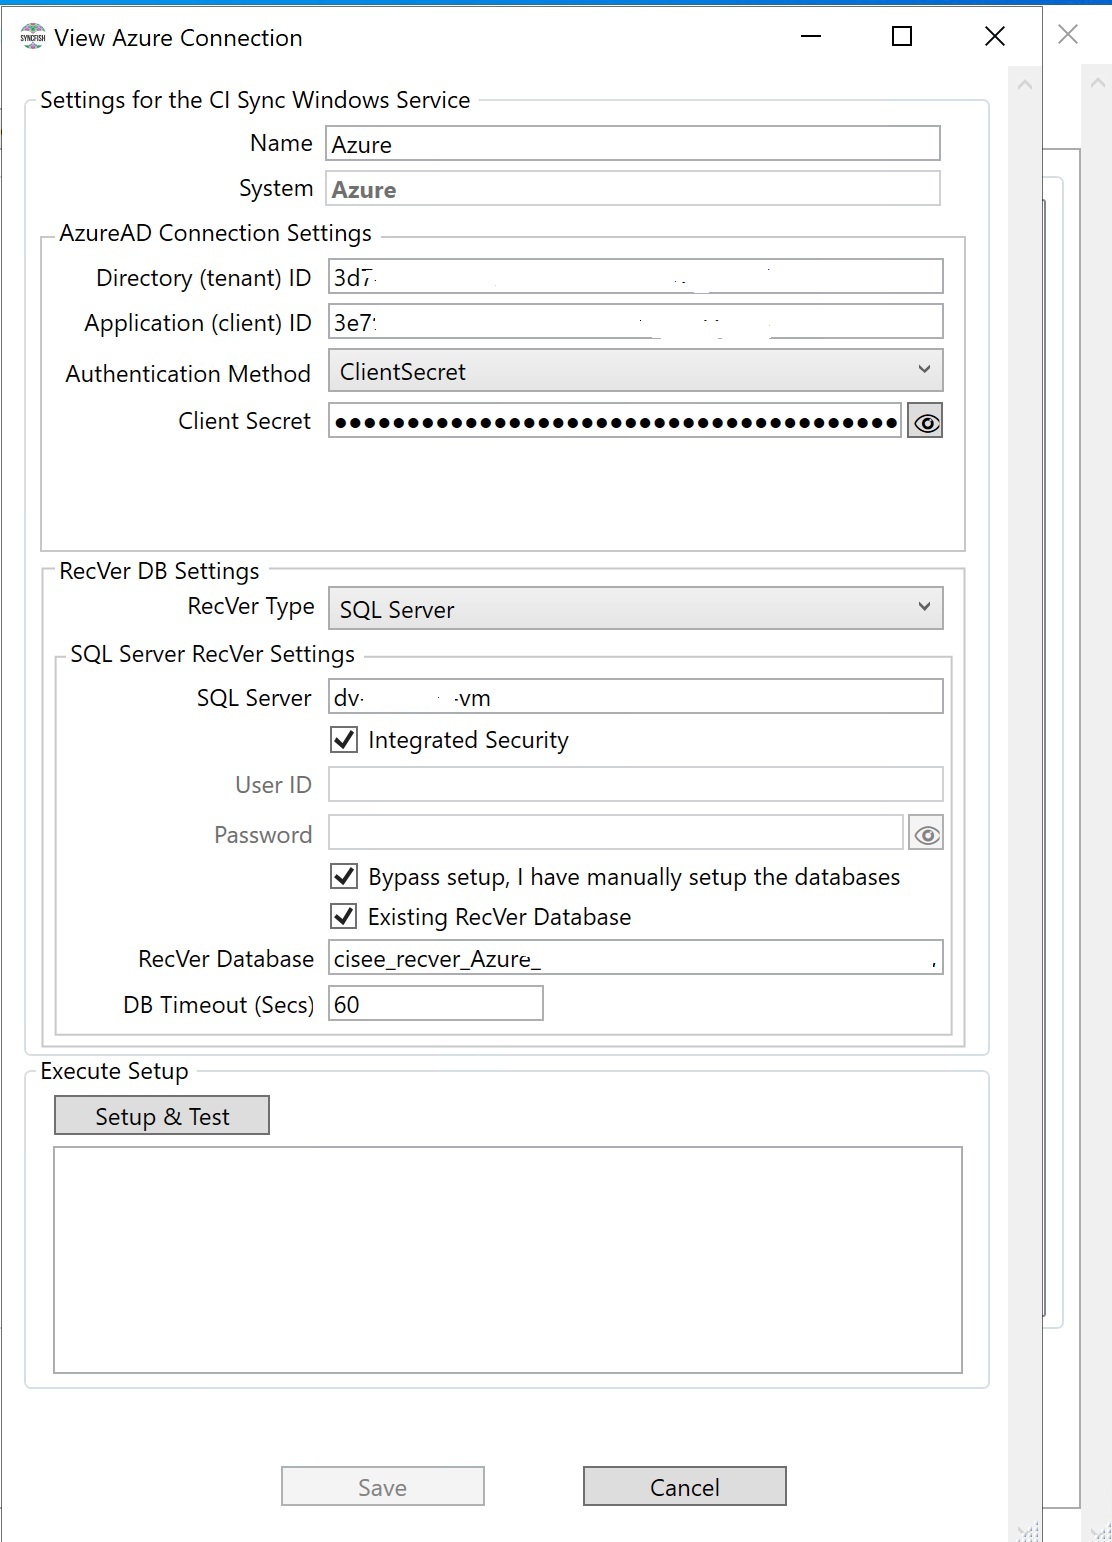
Click the Source Systems tab
-
Double click the Azure connection.
-
Replace the client secret with the one you previously generated and copied above.
-
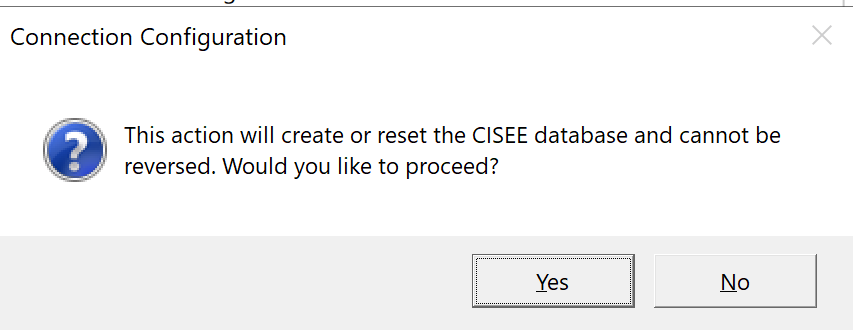
Click the Setup & Test button.
-
Click Yes.
-
Then click Save.