Extended Page Title
Step 7 - Add your ServiceNow Instance as a Destination Connection for CI Sync via the CI Sync Web UI
Task List
|
Task # |
Task |
Performed by |
|---|---|---|
|
1 |
Add a ServiceNow Destination Connection for CI Sync |
CI Sync Admin |
Task 1: Add a ServiceNow Destination Connection in CI Sync
-
Login to your CI Sync SaaS application user interface using your company specific URL and with your user account in the same AAD tenancy that the CI Sync SaaS application was registered in. The URL will be in the format of: https://YourCo.syncfish.app
-
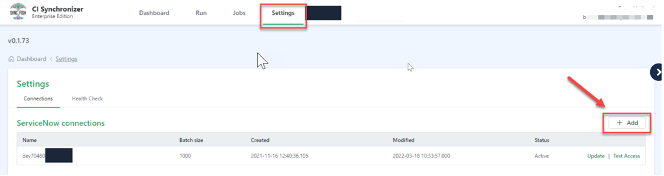
Go to the Settings page and under the ServiceNow Connections heading, click the [+ Add] button
-
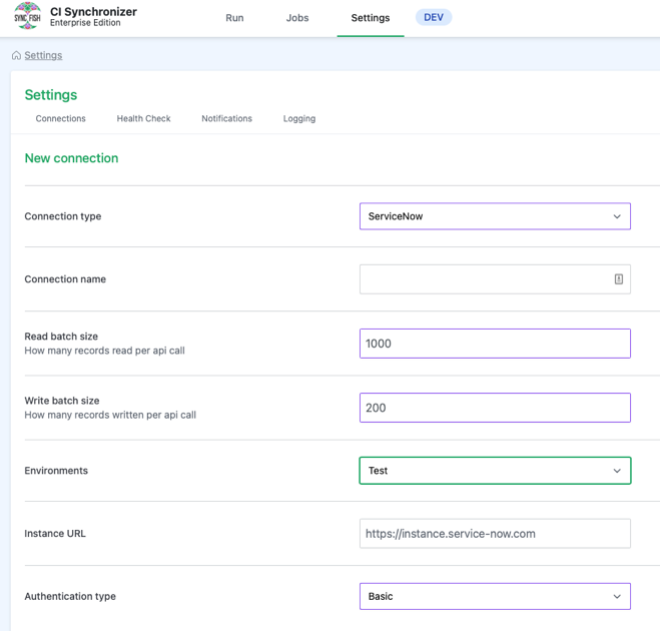
Update the fields as follows:
-
Enter a friendly name into the Connection name field.
-
Leave the default Read Batch size of 1000
-
Leave the default Write Batch size of 200
-
Select the relevant value for the Environment related to this connection. The options are:
-
Test
-
Production
-
-
Informational Note
The Connection Name and Environment values entered here control the Destinations you see on the “Run” page in the CI Sync User Interface where you are setting up a CI Sync job.
-
Continue to update the fields as follows:
-
Enter the Instance URL for the ServiceNow instance. e.g. https://YourCo.syncfish.app
-
Guidance Note
-
If this connection is for your TEST ServiceNow instance, enter the non-production ServiceNow instance URL.
-
If this connection is for your PROD ServiceNow instance, enter the production ServiceNow instance URL.
-
Select the Authentication type as one of the following
-
Basic
-
OAuth
-
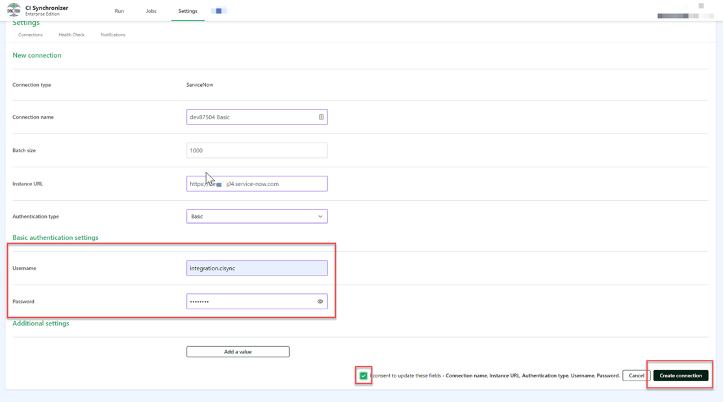
Click to expand the instructions for Basic Authentication
-
Enter username, password
Gudiance Note
This relates to the ServiceNow user (and Basic Auth details) setup during Task 3: Create a User Account (to be used by your CI Sync SaaS instance) within S3 - Configure ServiceNow for CI Sync.
-
Tick the “I consent…” checkbox
-
Click “Create connection”
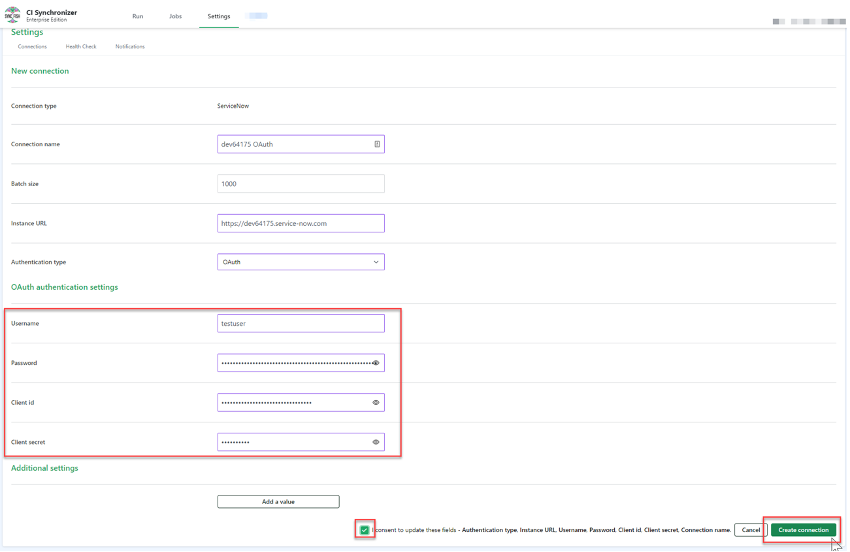
Click to expand the instructions for OAuth Authentication
-
Enter username, password, client id and client secret
Gudiance Note
This relates to the ServiceNow user (and OAuth details) setup during Task 5: (Optional) Configure OAuth Authencitation on the CI Sync User Account within S3 - Configure ServiceNow for CI Sync.
-
Tick the “I consent…” checkbox
-
Click “Create connection”
-
Go back to the Settings page
-
Confirm you have a green light against your newly created ServiceNow connection (for destination system access).

-
If you don’t see green against your ServiceNow connection, then
-
Recheck the connection settings for ServiceNow in the CI Sync UI.
-
Recheck the authentication details are correct on the ServiceNow end.
-
After you have green lights on the source and destination connections:
-
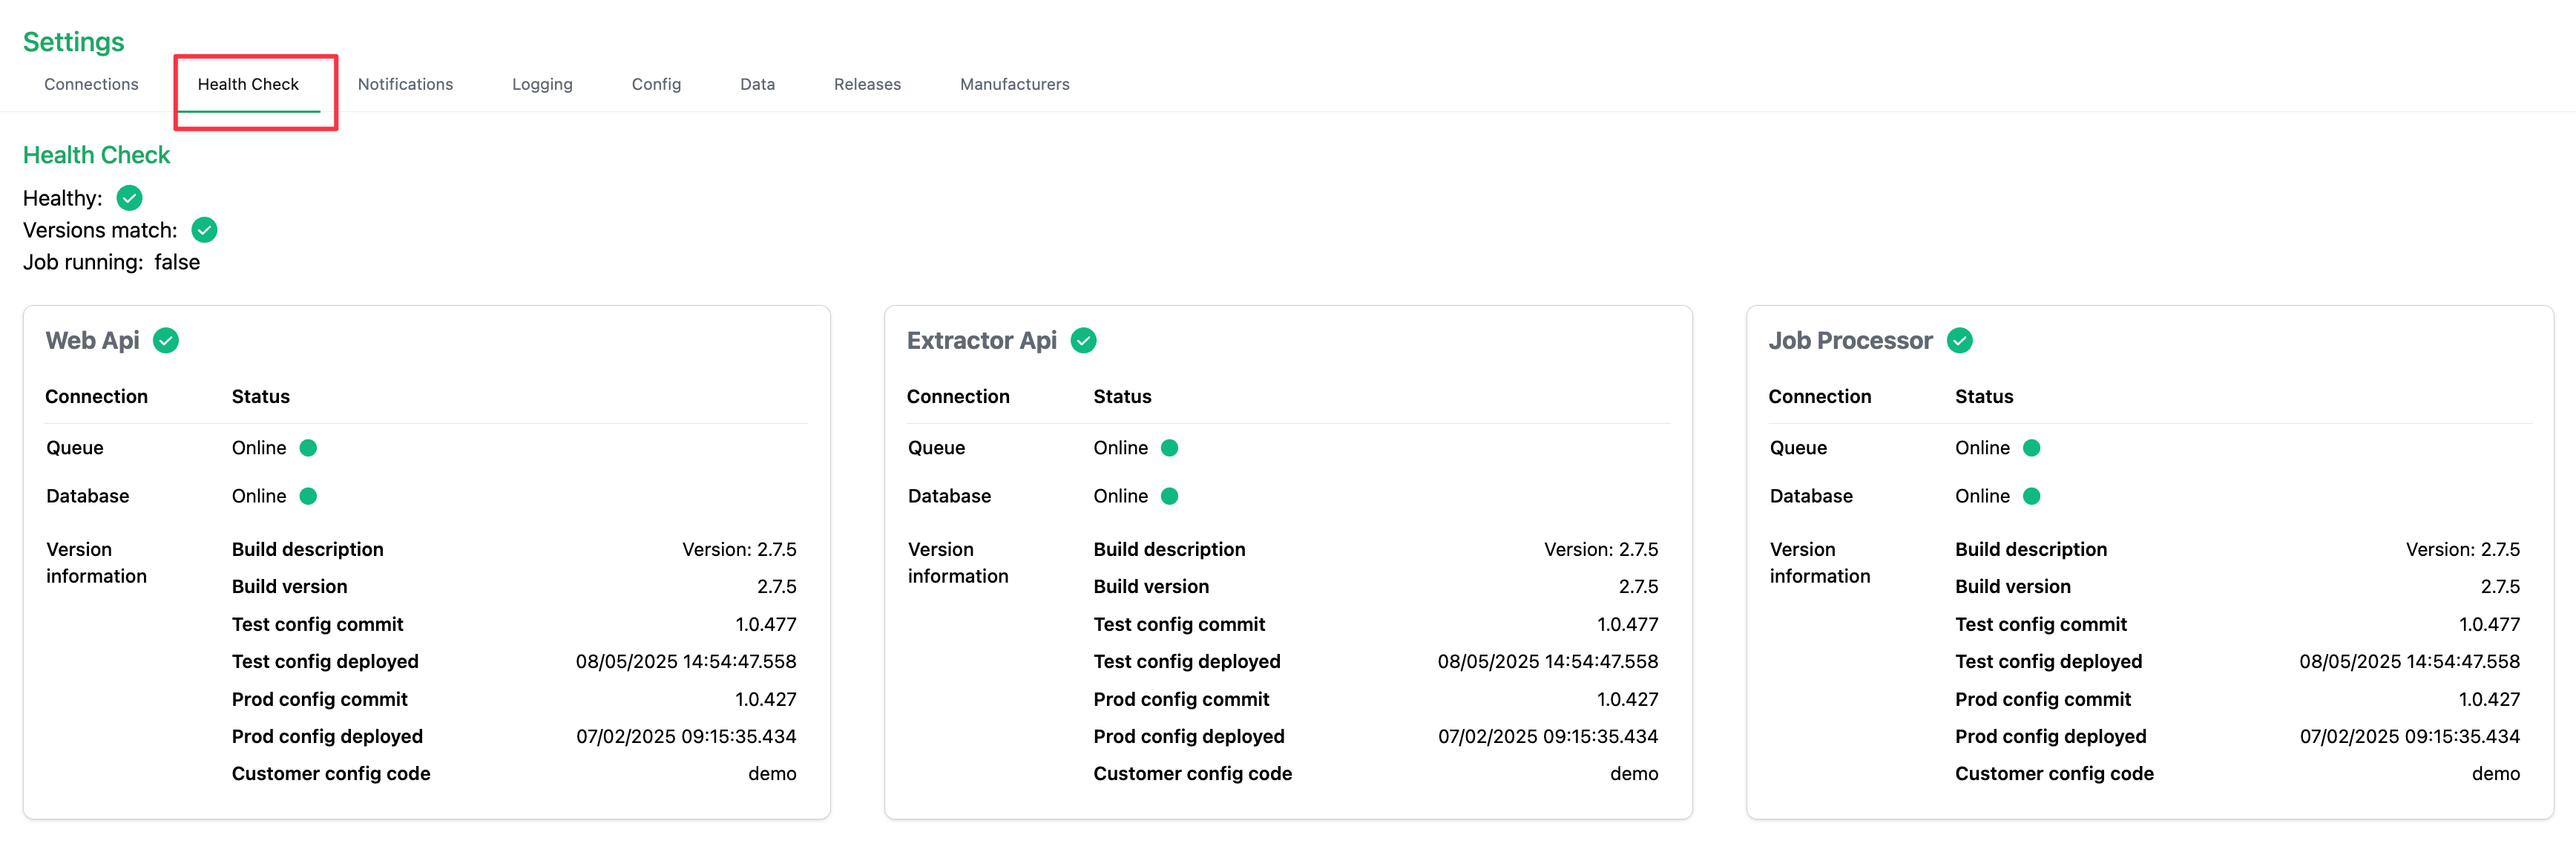
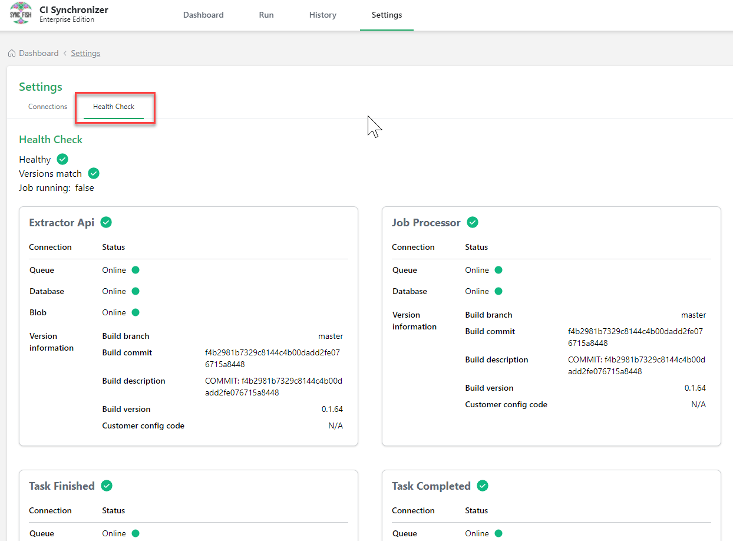
Click on the Health Check heading and ensure you have green lights/ticks against the various sections on the page.
-
If any of the indicators are not green, please contact the Syncfish Support team.
-