Extended Page Title
Step 2 - Enroll your CI Sync SaaS instance as an Enterprise Application in your Azure AD/Entra ID
Task List
|
Task # |
Task |
Performed by |
|---|---|---|
|
1 |
Enrol your CI Sync SaaS instance as an Enterprise Application in your Entra ID |
Azure Admin |
|
2 |
Grant users access to the CI Sync SaaS application (so they can use the CI Sync Web UI) |
Azure Admin
|
Task 1: Enrol your CI Sync SaaS instance as an Enterprise Application in your Entra ID
-
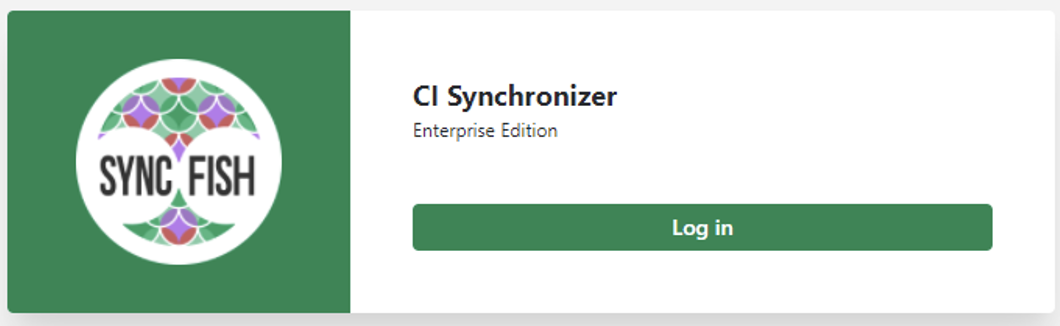
Your Entra ID Admin should open a browser and navigate to the Syncfish provided URL to your company specific instance of the CI Sync SaaS application User Interface. The URL will be as shown below:
-
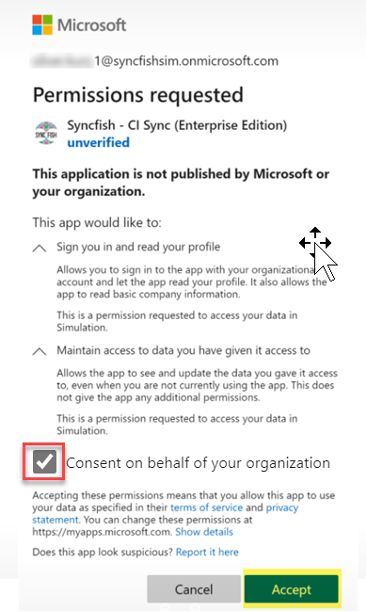
When prompted to sign in, ensure you login with an Entra ID Admin account in the same AAD tenancy that you provided to Syncfish.
-
You will be prompted to Accept the Permissions requested and to Consent on behalf of your organisation. When you click Accept it will enrol the CI Sync SaaS application in your Entra ID.
-
Once the enrolment is complete, you will be returned with a HTTP 403 error “Requested resource is forbidden”.
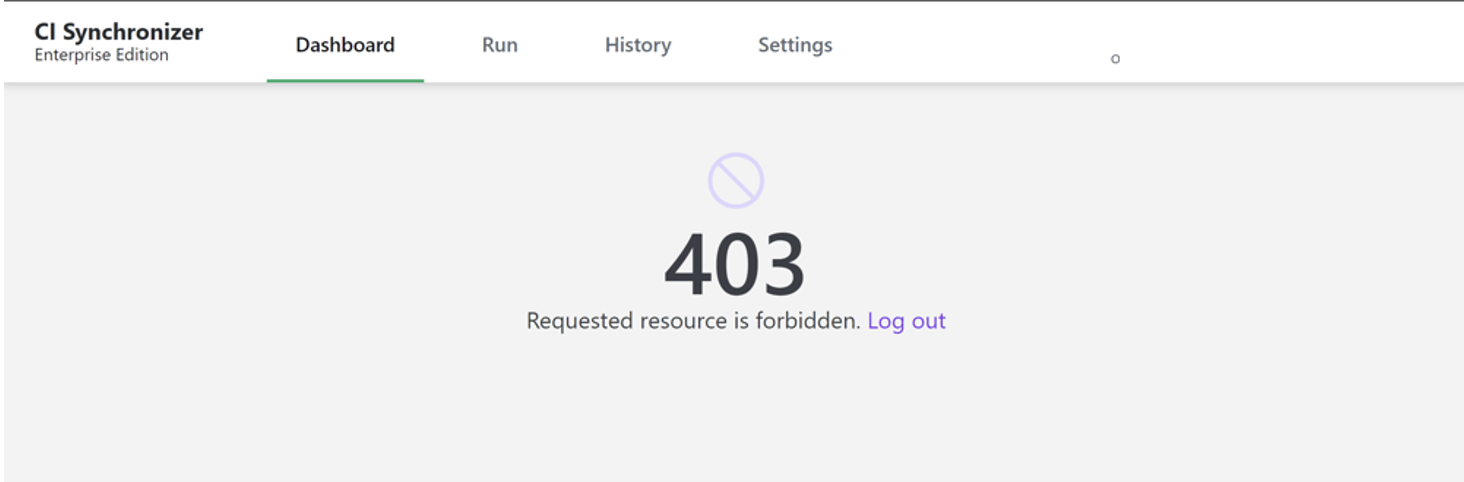
The 403 error is expected behaviour because the user account (of your Entra ID Admin) has not yet been granted access to the newly enrolled CI Sync Enterprise Application.
The steps required to grant individual user access to the CI Sync SaaS application User Interface are documented further below.
-
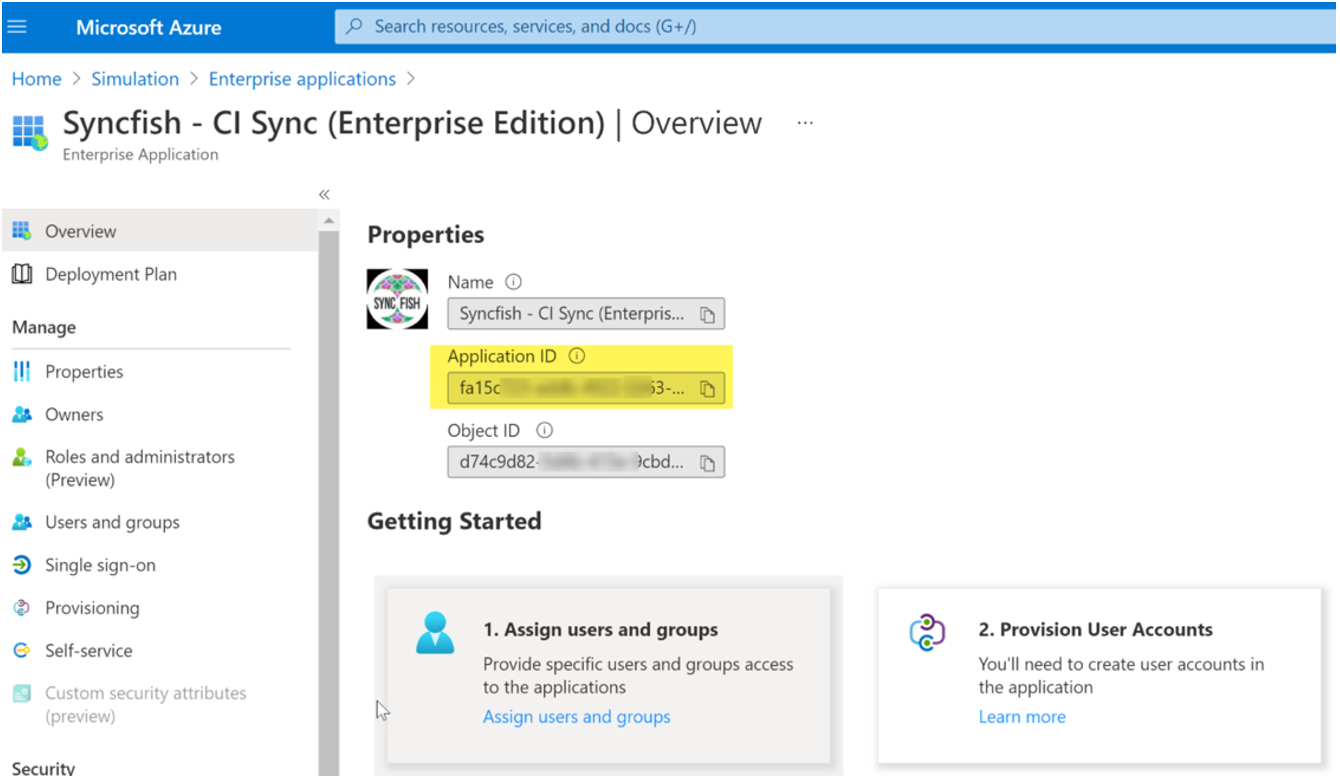
Your Entra ID Admin should now use the Azure Portal to verify the CI Sync SaaS application was successfully enrolled as an Enterprise Application in your Entra ID. To do this:
-
Login to the Azure Portal
-
Navigate to Azure Active Directory
-
Select Enterprise Applications
-
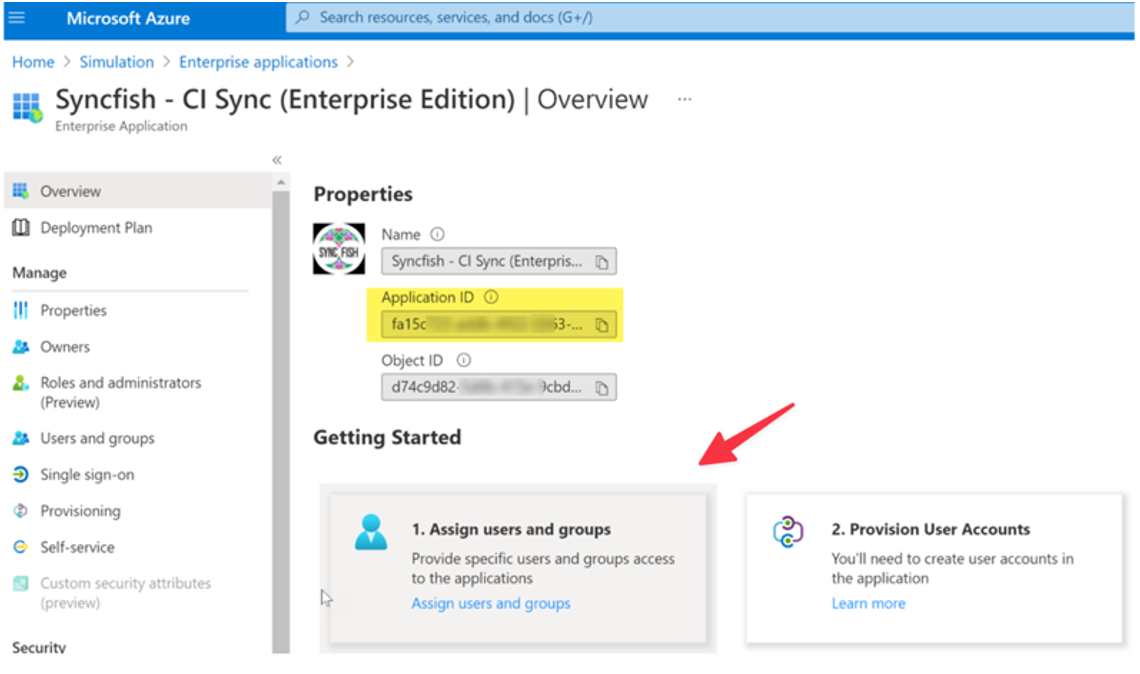
Find and select the newly created CI Sync Enterprise Application in the list (i.e. “Syncfish – CI Sync (Enterprise Edition)”)
-
From the Overview menu item, ensure Properties such as Name, Application ID and Object ID have all be populated.
-
Task 2: Grant users access to the CI Sync SaaS application (so they can use the CI Sync Web UI)
-
In the Azure Portal, navigate to Entra ID -> Enterprise Applications and select the CI Sync application (i.e. “Syncfish - CI Sync (Enterprise Edition)”)
-
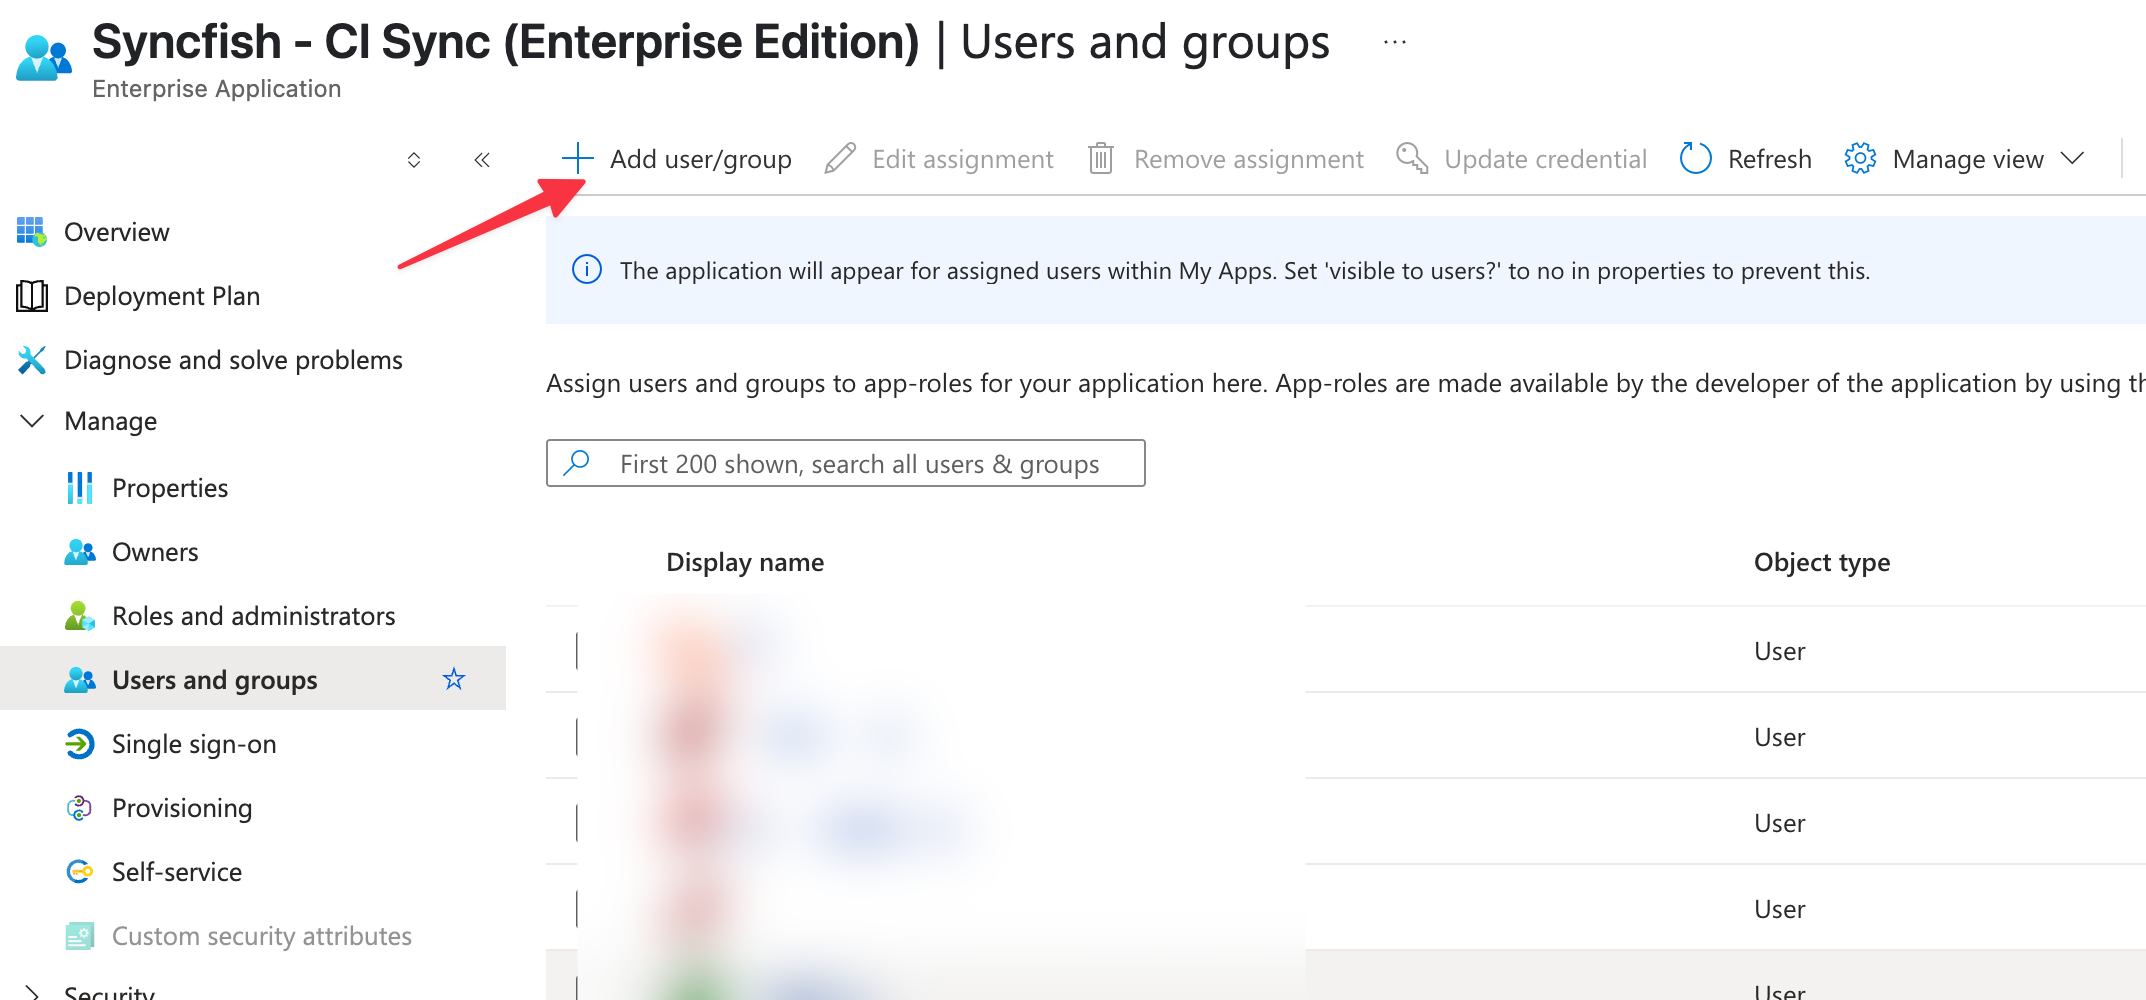
Click the “Assign users and groups” hyperlink under Getting Started -> 1. Assign users and groups.
-
There may already be a Role Assigned “Default Access” depending on which account enrolled the Enterprise App. This role assignment can be left alone but we still need to add the “administrator” role assignment.
-
Click Add user/group
-
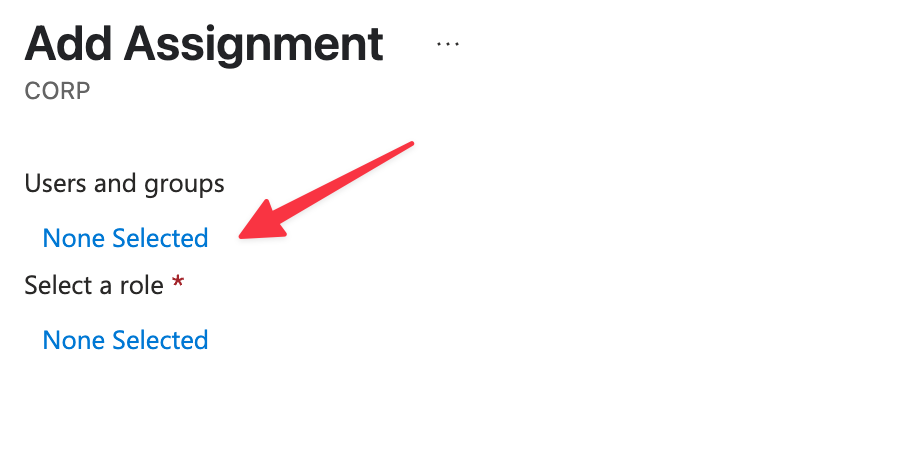
Click the None Selected link under Users and Groups.
-
Use the right-hand pane to filter/search and select the user/s and/or group/s you want to grant access to the CI Sync SaaS application (i.e. to those few users expected to create and schedule synchronization jobs via the CI Sync Web UI). When ready, click the Select button to complete.
-
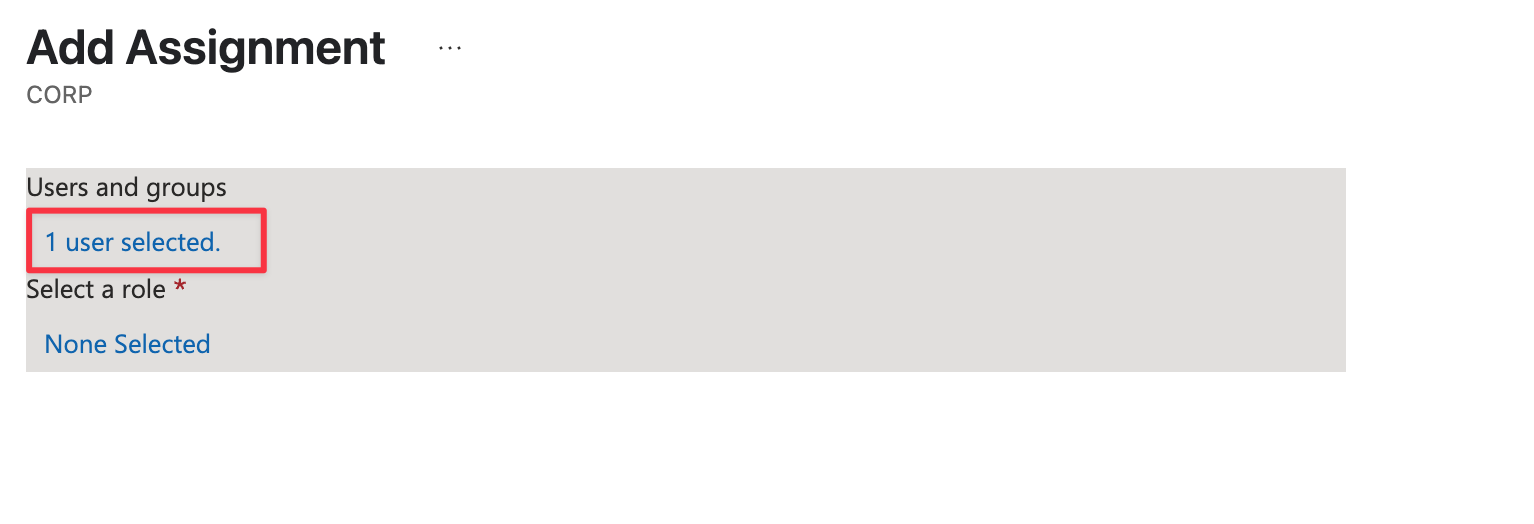
You have now granted a user (or a group) access to the CI Sync Web UI.
-
You now need to grant a CI Sync role for those same user/s or group/s (otherwise they will not have sufficient permissions within the CI Sync SaaS application. The table below explains the functionality available in the CI Sync Web UI for each role.
|
CI Sync Role |
CI Sync Web UI Functionaly |
|---|---|
|
Administrator |
Full access to all features in the UI (add new source/destination connections, amend any CI Sync settings, run a sync job immediately, create a scheduled sync job). |
|
Reader |
Able to view all features in the UI but not make any changes. |
|
Scheduler |
Same as reader but can also schedule and review sync job logs (this role cannot update settings or create/run new sync jobs). |
|
Billing |
Currently not in use (i.e. no specific functionality implemented for this role) |
-
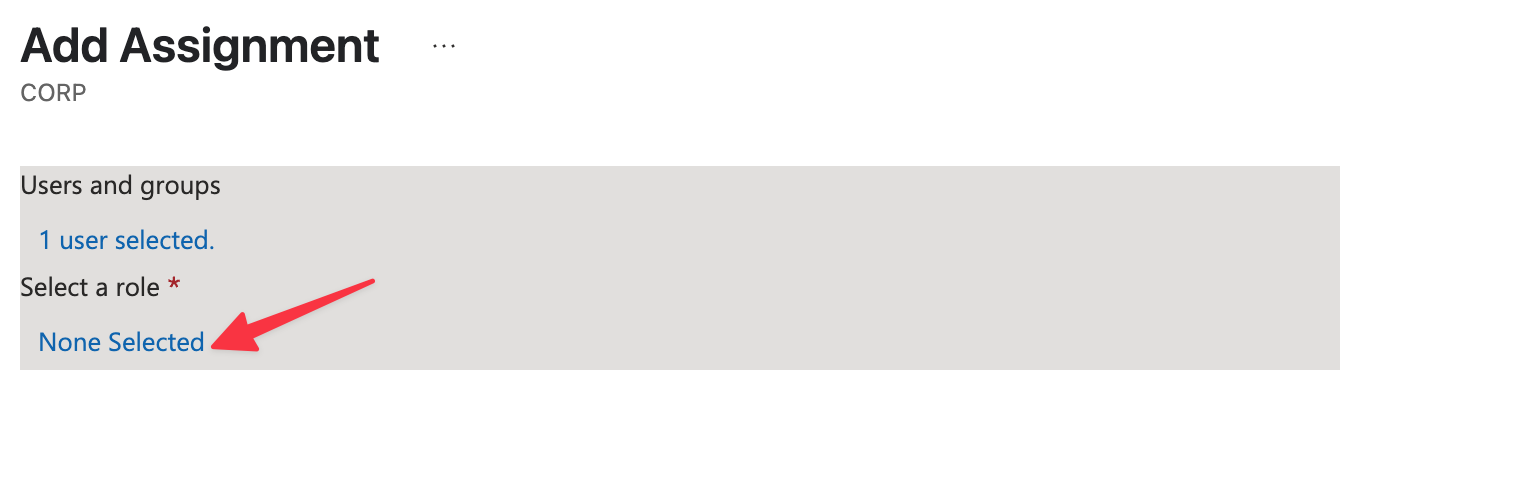
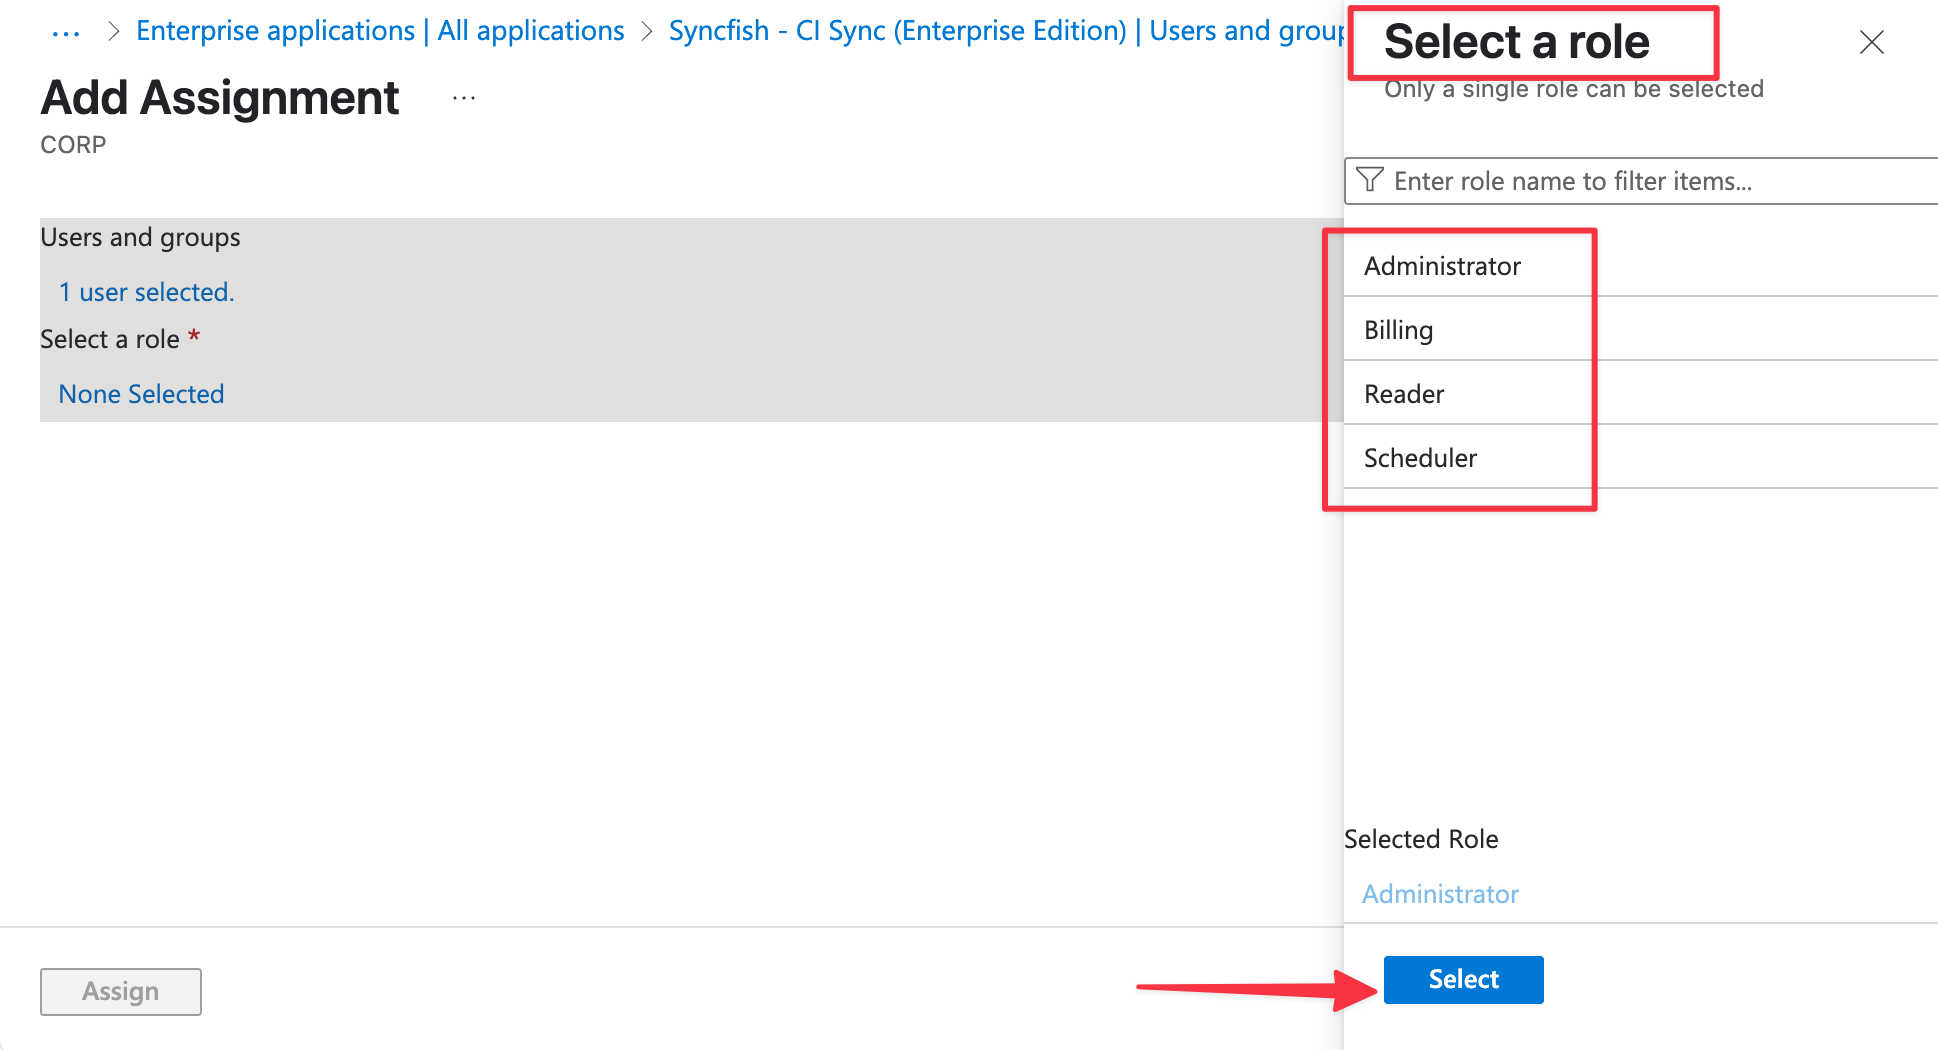
Click the None Selected link under Select a role
-
Use the right-hand pane to select the one of the predefined CI Sync Roles. Select the required role and then click the Select button to complete.
You need to set at least one initial user to have the Administrator role so they can perform subsequent tasks through this setup guid.
-
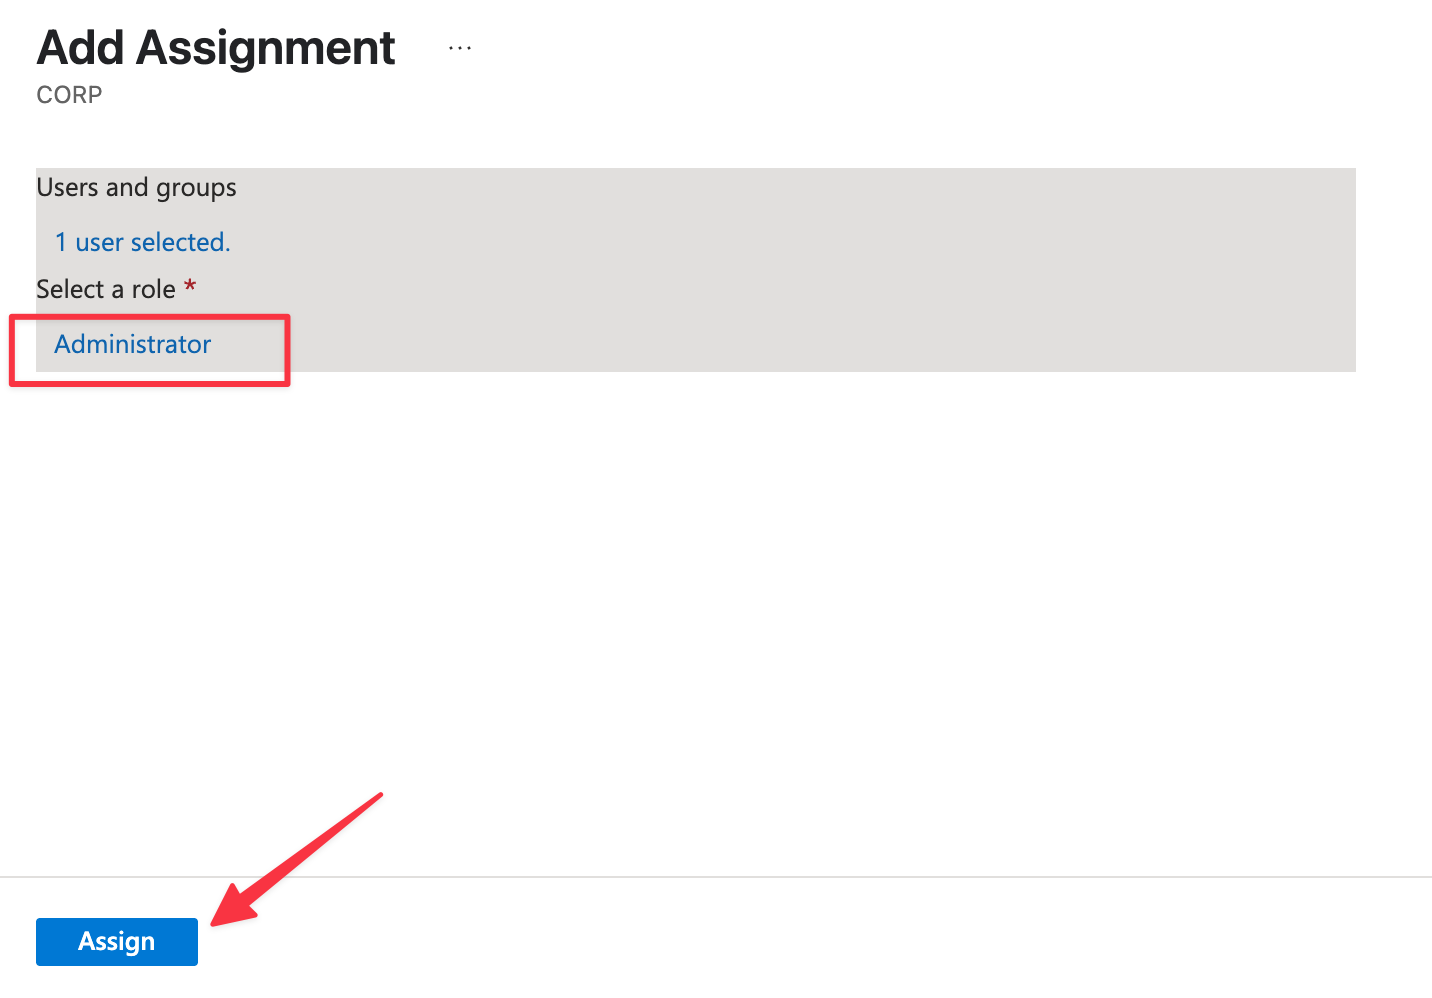
The screen should look as below. When ready, click the Assign button at the bottom of the screen.
-
The users who were granted access should now be able to login and use the CI Sync SaaS application User Interface. They can test by navigating to the Syncfish provided URL to your company specific instance of the CI Sync SaaS application User Interface. The URL will be as shown below:
-
When prompted to sign in, login with your regular AAD user credentials (including any MFA requirements).
-
Upon successful login you will be presented with the CI Sync Home Page of the CI Sync Web UI.