Connector Applicability
|
Applies to Source Connectors |
GCP |
|---|---|
|
Applies to Destination Connectors |
All |
Assumptions
These instructions assume you have already setup a source connection in CI Sync for GCP using the CI Sync instructions here: Add GCP to SaaS Agent.
Pre-Read
Syncfish recommend customers read the following documentation before changing the Connection Setting/s described below.
GCP has the concept of Labels and Tags for Cloud Resources.
CI Sync therefore allows customers to synchronize either or both Labels and Tags.
Furthermore, because there can be an overlap of Labels and Tags in GCP (i.e. the same named Label and Tag can be used to seed the same destination attribute on a CI record), CI Sync allows customers to define whether the value of a give Label or Tag takes priority.
Locating and Amending the Connection Setting in the CI Sync UI
-
Navigate to the Settings page
-
Under the Source Connections heading (list), locate your GCP connection.
-
Click the Update link on the right hand side of the GCP connection.
-
Scroll down and locate the Section Heading and view the Individual Settings.
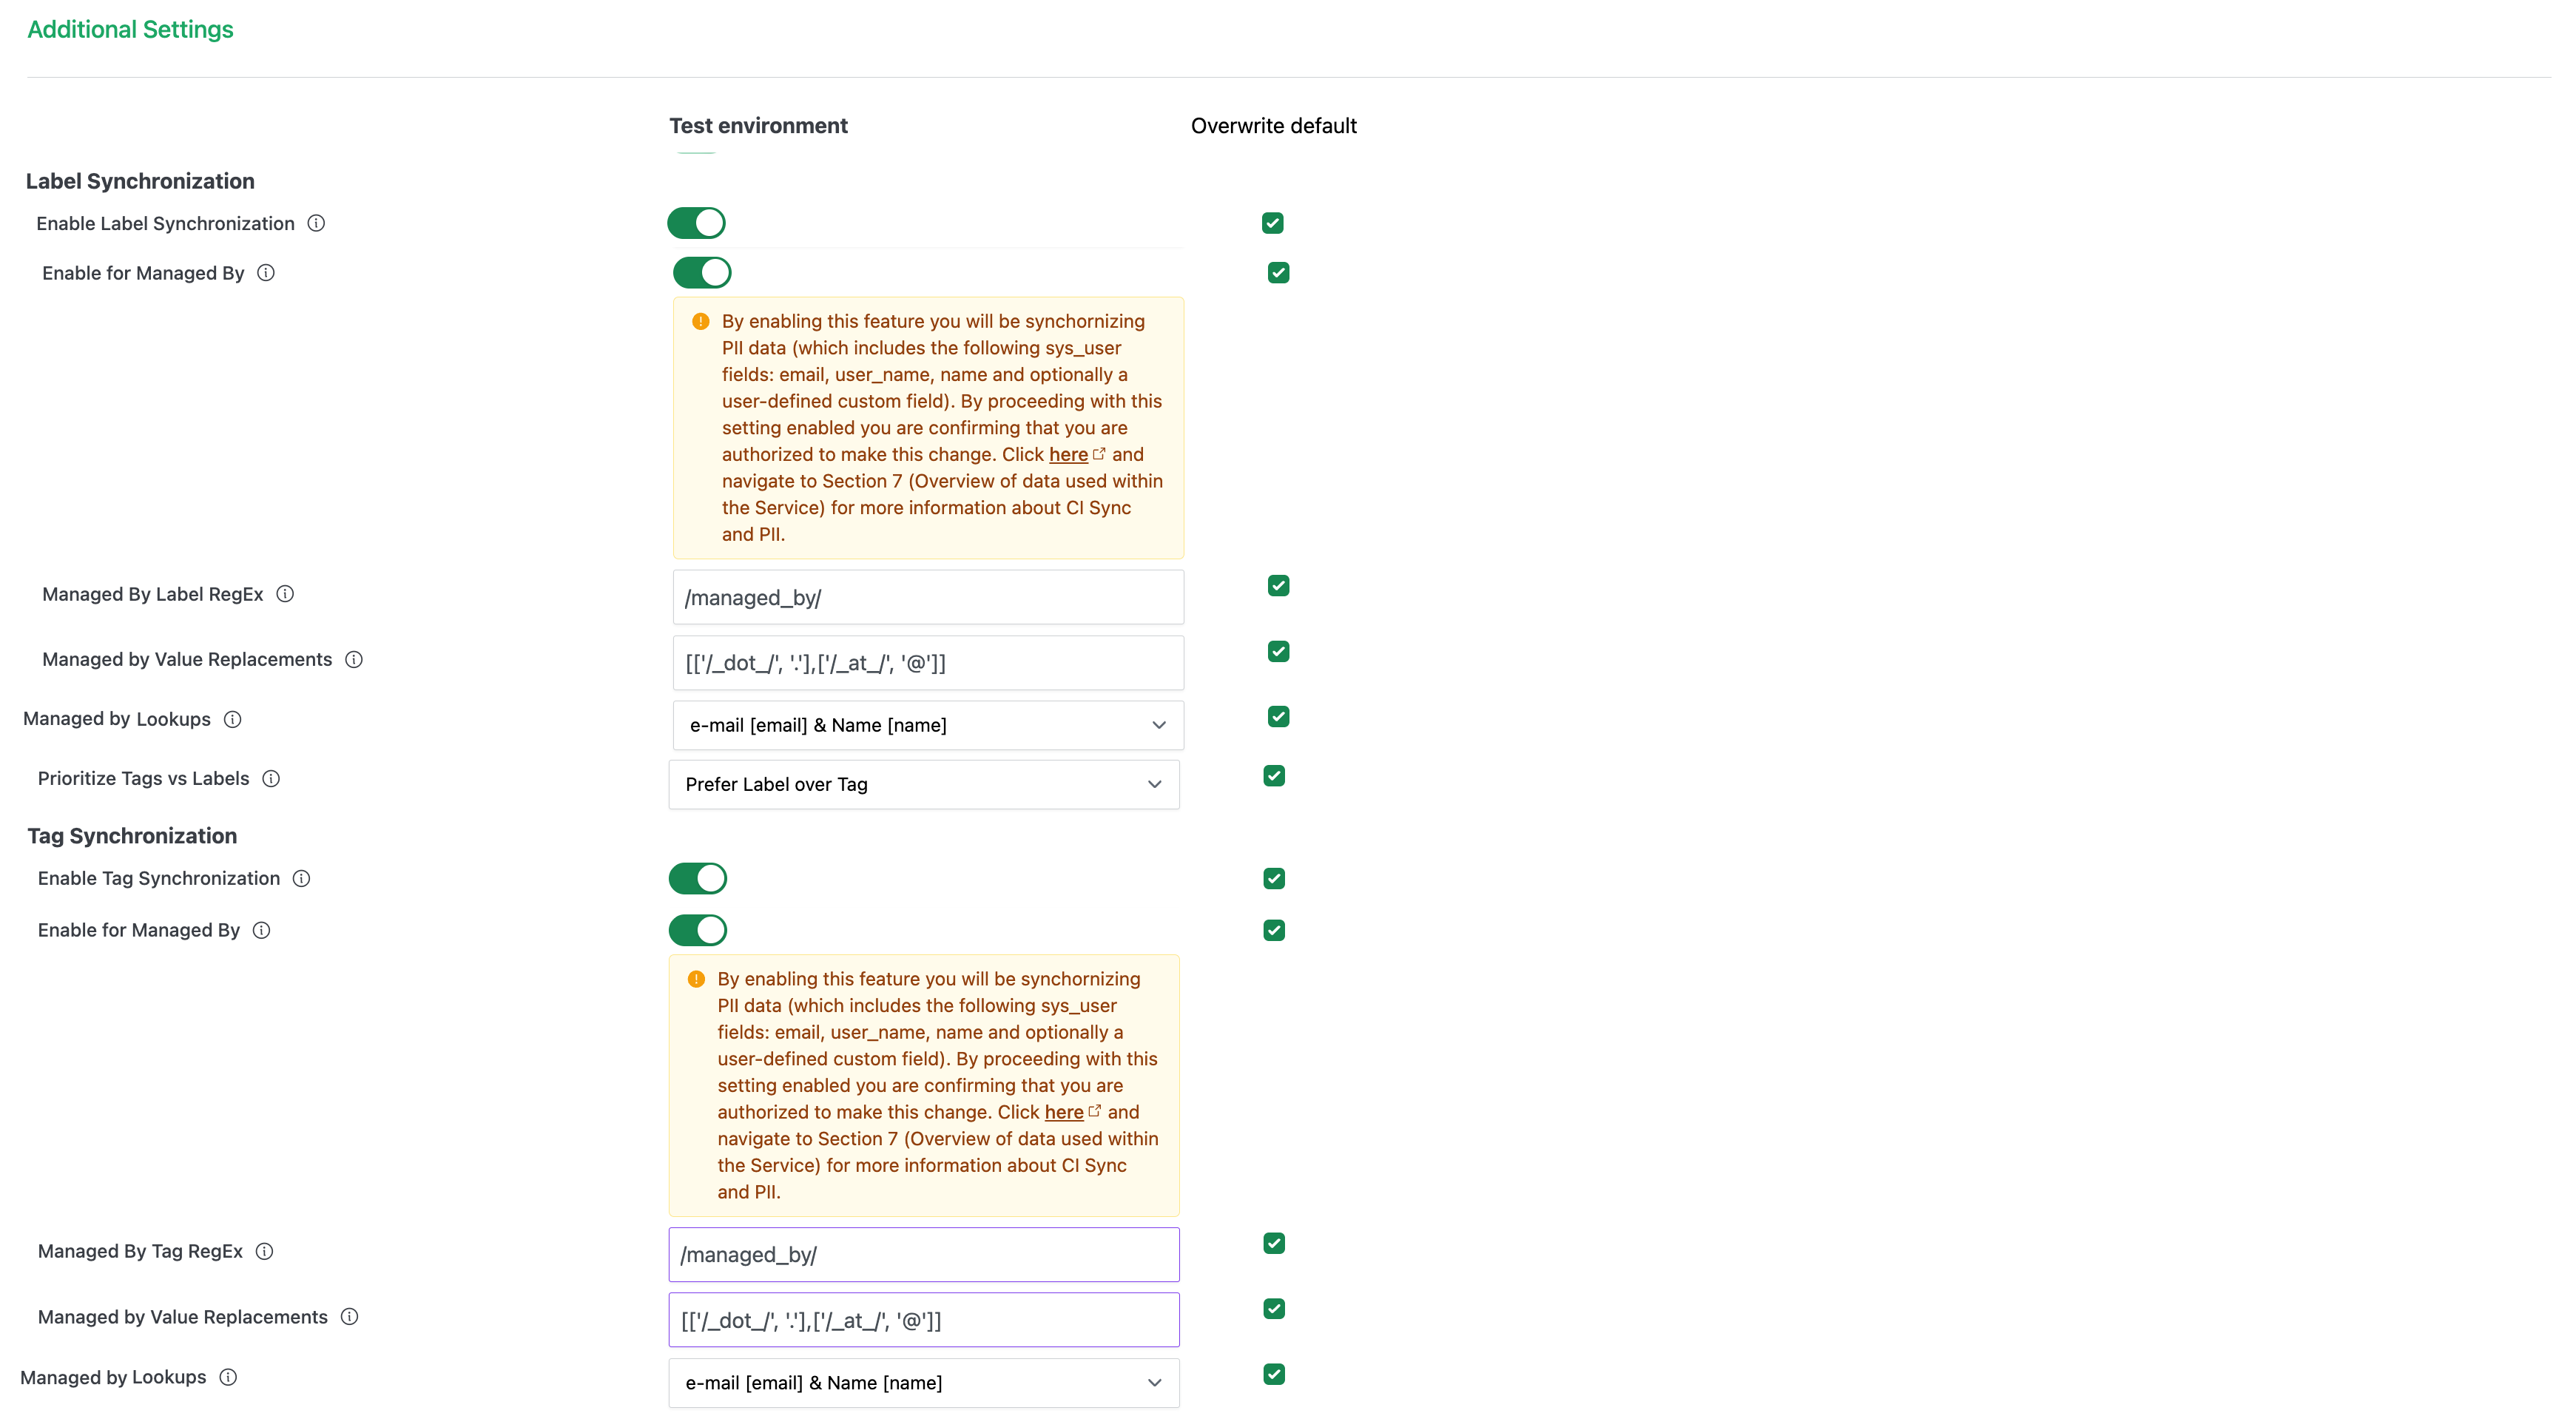
The screen shot is provided only as sample to assist when reading this page. The state of your own CI Sync UI will depend on whether you are starting from the CI Sync default position or if you have already amended one/more of the settings.
-
Tick the Override default box/boxes and then use the sliders related to the individual settings. The following table elaborates any further information about these particular settings.
|
Setting |
Type |
Additional Notes |
|
For Label Synchronization |
||
|
Enable Label Synchronizatiion |
Slider |
If enabled, CI Sync will use the subsequent Connection Settings (in the rows below) to read the relevant Label from GCP and persist the value into ServiceNow as follows:
Customers need to enable and configure one or more of the subsequent Connections (described in the rows below) after enabling this setting, |
|
For Tag Synchronization |
||
|
Enable Tag Synchronizatiion |
Slider |
If enabled, CI Sync will use the subsequent Connection Settings (in the rows below) to read the relevant Tag from GCP and persist the value into ServiceNow as follows:
Customers need to enable and configure one or more of the subsequent Connections (described in the rows below) after enabling this setting, |
|
The following settings can then be used for either/both Label and Tag Synchronization |
||
|
Prioritize Tags vs Labels |
Choicelist |
Select one of the available choicelist items to control the behaviour when both Tags and Labels are being used for the same destination attribute in ServiceNow (e.g. an “Managed By” Tag and an “Managed By” Label both exists and CI Sync will be persisting both into the cmdb_ci.managed_by attribute). See below for the available choices.
|
|
Enable for Managed By |
Slider |
If enabled, defined Labels or Tags will be synchronized to the managed_by field against CIs in the CMDB. When enabled, the Managed By Label RegEx field will be exposed (see below). For a diagrammatic view of how Assigned To user synchronization works in CI Sync (covering both the source system behaviour/settings and the destination system behaviour settings), please read the Addition Information section on this GCP Default Config Guide page: Rule 14 - Synchronization of User Oriented Tag or Label from GCP Important PII Consideration when enabling this setting When enabling this setting the CI Sync UI will warn of potential PII implications. Please read the message shown and also read Section 7 (Overview of data used within the Service) in the CI Sync Service Specification published here. Section 7 explains the impact of enabling this setting for both persisted data and transited data. |
|
Managed By [Label | Tag] RegEx |
RegEx |
Enter a Regular Expression that matches one or more Label or Tag names in GCP (i.e. one or more Labels or Tags that represent the Owned By associated with the GCP resource). Example RegEx /^ManagedBy$|^ManagedByTag$|^ManagedBy 1$|^ManagedBy 2$|^ManagedBy1$|^ManagedBy$/ RegEx Explained This RegEx will identify Labels (or Tags) named “ManagedBy”, “ManagedByTag”, “ManagedBy 1”, “ManagedBy 2”, “ManagedBy1” or “ManagedBy2” (i.e. six variations) and sync’d the associated values into ServiceNow. Sync Behaviour and ServiceNow Data Explained
Syncfish recommend customers read the following FAQ for more information about the behaviour of Tag (or Label) synchronization into ServiceNow. |
|
Managed by Value Replacements |
Choicelist |
For context in GCP: GCP is restrictive as to the values allowed in Labels, therefore CI Sync provides support for transforming GCP Tags or Labels into valid user names. For user names: as GCP does not allow for the entry of space characters in Label values, CI Sync provides for the substitution of either “-” or “_” with a space character when searching the sys_user.name field. This setting allows customers to define a search and replace RegEx express that acts on the values read from a given Label or Tag. Enter a Regular Expression that defines the search string and the replacement value string. The RegEx format consists of a two element array. The first element is the search RegEx and the second element is the replacement text. Example RegEx [['/dot/', '.'],['/at/', '@']] RegEx Explained This RegEx will replace the literal text “dot” with a “.” (period) character, and will replace the literal text “at” with the “@” symbol. For example “AndrewdotKentatsyncfishdotcomdotau” will be transformed to “Andrew.Kent@syncfish.com.au” (without the quotes.. they are just for reference in this documentation) |
|
Managed By Lookups |
Choicelist |
Select one of the available choicelist items which control sys_user attribute/s CI Sync searches using the value/s in the tag. See below for the available choices. 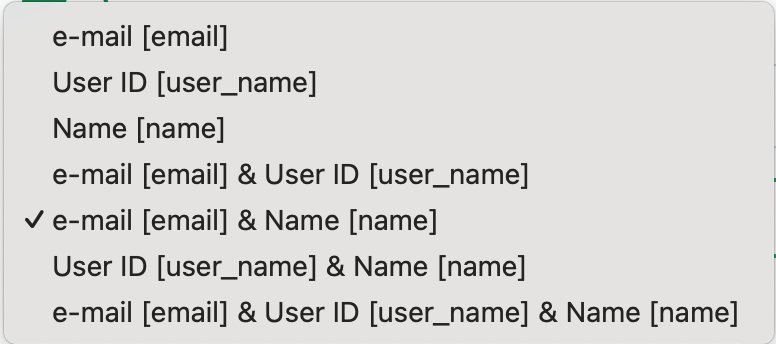
In this example if you select ‘e-mail [email] & Name [name]' you will see a message as per below explaining that you must select the corresponding options in the ServiceNow destination connection 'User Synchronization’ section. Please refer to the document linked below. Define a User oriented attribute when using User Synchronization from a Source System in ServiceNow If the corresponding selection in ServiceNow is not made the sync job will error. 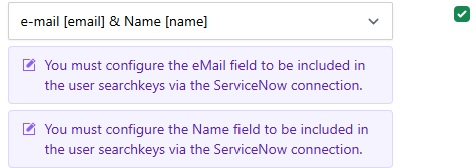
|
-
After modify the settings, scroll to the bottom of the page, tick the “I consent…” checkbox and finally click the Save connection button.
-
You can now run a sync job and the amended settings will be applied causing the CI Sync Data Sync rules to be modified accordingly.
Importantly
Make sure you consciously override the setting against either your TEST or PROD environment (i.e. your TEST vs PROD sync jobs).
For more information on how to use TEST vs PROD Connection Settings please read Understanding the use of CI Sync Connection Settings.
Syncfish strongly recommend making changes for TEST environment/sync jobs first. Only modify PROD related settings after thoroughly validating the intended results in TEST.